Screen Capture
The screen capture tool can take screenshots and record and stream video of the GUI and 3D scene.
It can be accessed from the button in the Toolbar. Click on the button to capture the screen in the current screen capture mode, or right-click on it to change the capture mode or open the Settings window.
Image/Video Capture
Right-click on the Toolbar button and select Settings... or open the Settings window and navigate to Screen Capture > Image/Video Capture to configure the tool.
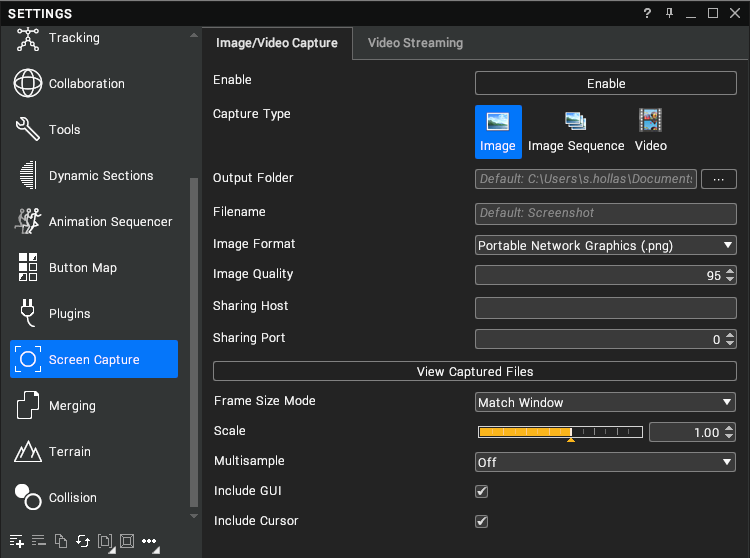
| Setting | Description |
|---|---|
| Enable | Click on the Enable button to capture the screen. This can also be triggered with the PrtScn key. |
| Capture Type | Whether to capture a single image, sequence of images, or video. |
| Output Folder | The folder in which to save captures. The default location is Documents\VisionaryRender\Screenshots. |
| Filename | The name of the captured file. This is suffixed with the current date, time, frame, and channel. |
| Image Format | The file format to output. |
| Image Quality | The quality of the saved image. |
| Sharing Host | The IP address of the sharing host. |
| Sharing Port | The port number to use to connect to the sharing host. |
| View Captured Files | Click on this button to show the directory of the captured files in Explorer. |
| Frame Size Mode | Whether to capture the whole window or part of it. |
| Scale | The scale of the captured image – i.e. a scale of 2 will cause the captured image to be twice the resolution of the screen. |
| Multisample | Whether to enable multisample anti-aliasing (MSAA) in captures. |
| Include GUI | Whether to include the interface in captures, or just the 3D scene. |
| Include Cursor | Whether to include the mouse cursor in captures if it is over the GUI. |
Video Streaming
Visionary Render can stream video to external devices and control them remotely using a program called ActiveView Light, which is included in the Visionary Render install package.
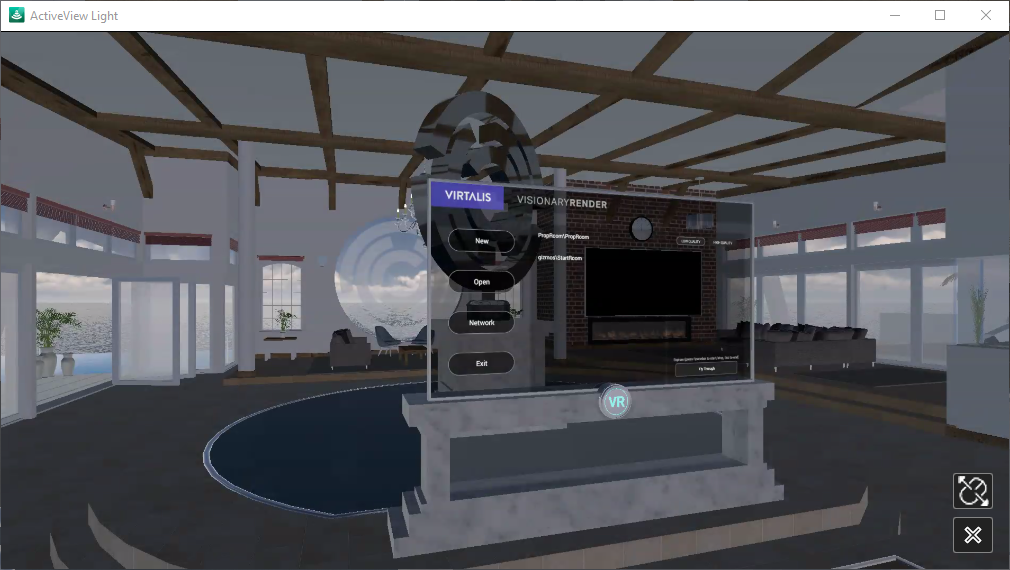
Multiple devices can connect to the same instance of Visionary Render.
Usage
Run Visionary Render on the host machine and enable video streaming from the Toolbar.
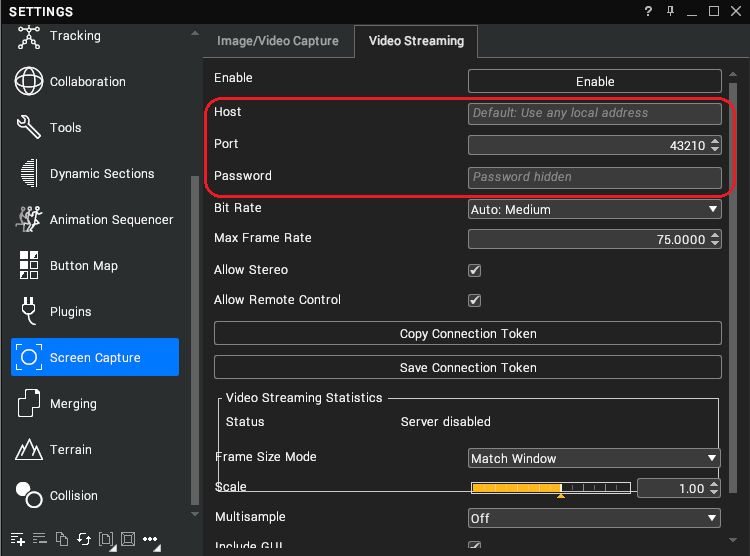
Right-click on the video streaming Toolbar button and select Settings from the drop-down menu to configure video streaming.
Copy the Local IP address from the Video Streaming Statistics panel into the Host IP address field. To find any other addresses the machine may have (e.g. for connecting over the internet), run ipconfig from a Windows command prompt. Edit the Port and Password settings if desired or leave them blank.
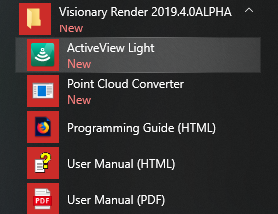
Run ActiveView Light from the client machine. This can be found in the Windows start menu.
Enter the host’s IP address, port, and password into the dialogue, then click on the Connect button. Saved connections can be managed with the
Save,+,-andCopybuttons at the bottom of the Saved connections panel.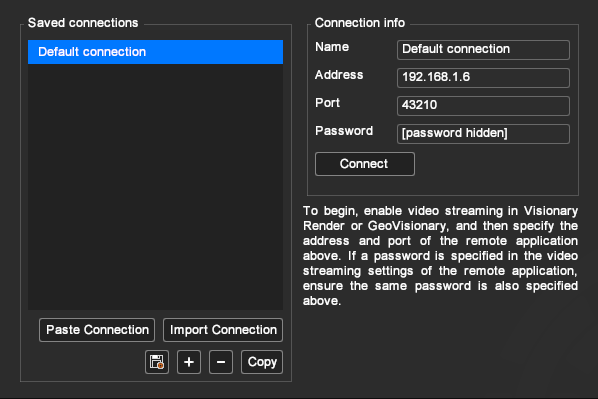
Ensure that Display Sync is enabled - it can be found under Settings > Renderer > General. If this is not done, the stream may appear choppy.
Configure streaming settings for quality or responsiveness (see the Quality Settings header below).
In ActiveView Light, click on the mouse button to allow remote control of the host machine. The
Xbutton exits back to the main menu.
Settings
Quality Settings
The default streaming settings are set up for medium-quality, high framerate, and low latency. Depending on your network and hardware capabilities, as well as desired result, these may need to be adjusted.
| Setting | Description |
|---|---|
| Bit Rate | Controls the target bit rate of the video stream. Higher means a higher quality image at the expense of increased network bandwidth usage. Set to Auto: Custom or Manual for more control as below. Note that the target bit rate is not always achieved – this can be seen in the Video Streaming Statistics panel. Note that unless set to Manual, the bit rate of the stream will also depend on the resolution of the window. |
| Bit Rate Adjustment | When Bit Rate is set to Auto: Custom, this value between 1 and 100 is a percentage of the maximum quality permitted by the video codec. |
| Manual Bit Rate | When Bit Rate is set to Manual, this is the exact bit rate targeted, regardless of resolution. |
| Max Frame Rate | Controls the maximum rate at which frames are sent over the network. For a smooth stream, this should be set slightly higher than the actual desired framerate, which itself should be a divisor of your graphics refresh rate (usually 60hz). Good values for this are 65 for a 60hz stream, 35 for a 30hz stream, or 25 for a 20hz stream. As mentioned above, it is imperative that Display Sync is enabled for a smooth stream. If the host machine is unable to render consistently at the desired framerate, a lower one should be chosen, otherwise there will be a knock-on effect to the smoothness of the stream. |
| Frame Size Mode | Controls the resolution of the stream. If set to Match Window, the current Visionary Render display is streamed as-is. Otherwise, the host’s display is adjusted to the desired resolution and that is streamed. The preset values are chosen for optimal performance but selecting Custom… allows any fixed resolution. |
| Custom Resolution | When Frame Size Mode is set to Custom…, this controls the resolution of the stream. |
| Scale | This can be set below 1 to send a lower quality stream while maintaining the resolution set above on the host. Conversely, setting to greater than 1 sends a higher quality stream. |
Other Settings
| Setting | Description |
|---|---|
| Streaming Enabled | Whether the streaming feature is enabled. |
| Host | IP address to use for outgoing connections. Can usually be left blank but can be set manually if connection issues are experienced. |
| Port | Port used for outgoing connections. If you are experiencing connection issues, try changing this to a known open port. |
| Password | Password required by clients to connect. |
| Allow Stereo | If enabled, stereoscopic 3D will be streamed in a side-by-side format to client devices when 3D is enabled in Visionary Render. |
| Allow Remote Control | Whether to allow clients to control this instance of Visionary Render. |
| Copy Connection Token | Copies to the OS clipboard a string of characters, which can then be pasted into a local instance of ActiveView Light with the Paste Connection button in its main menu to automatically transfer connection details. |
| Save Connection Token | Allows you to save a file containing a string of characters, which can then be imported into ActiveView Light with the Import Connection button in its main menu to automatically transfer connection details. |
| Multisample | Renders the scene with Multisample Anti-aliasing while streaming. |
| Include GUI | Whether or not to show the GUI on remote devices. |
| Include Cursor | Whether or not to show the cursor on remote devices. |
ActiveView Light Texture
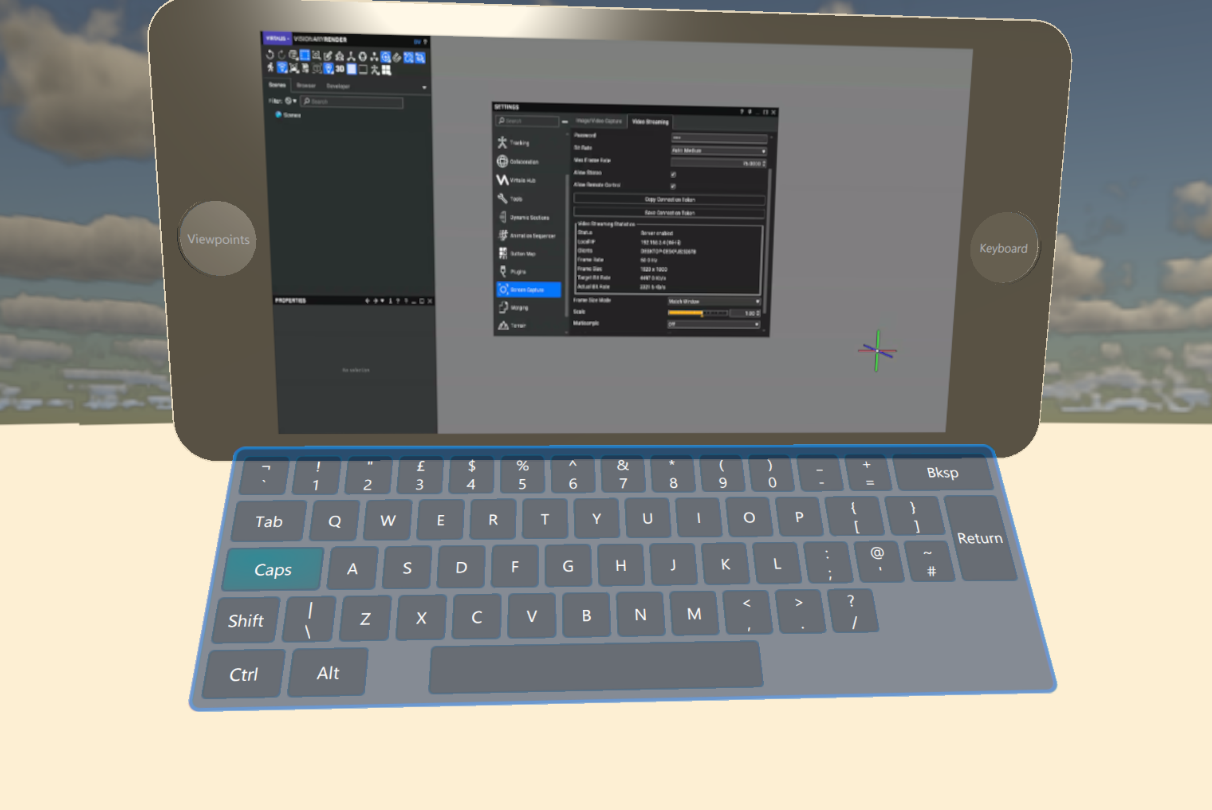
It is also possible to stream video to a texture in Visionary Render. This is a special node that can be used in place of a normal texture. As well as streaming video from a remote machine, the texture can detect mouse input across the surface it is rendering and convert that back to remote control data. It also provides an interface so that scripting can be used to send data back to the remote server. This could be used to implement a virtual keyboard for example.
Create
- Ensure that video streaming is enabled in the Toolbar.
- Create a Library and then an ActiveView Light Texture node (the internal name of this node is NetPlayerTexture).
- Create a material and link the ActiveView Light Texture to its colour map.
- Apply the material to the surface that will display the video stream.
- Set the properties of the ActiveView Light Texture as described below.
Properties
| Property | Description |
|---|---|
| Enabled | Whether the ActiveView Light Texture is enabled. When enabled, it will attempt to connect to the video server and render the video stream. Otherwise the player is inert and deactivated. |
| Host | Hostname or IP address of the video server. |
| Port | TCP/IP port number of the video server (the default is 43210). |
| Password | Password for the video server. |
| Remote Control | Whether to transmit remote control data. |
| State | Indicates the activity state of the player. (see State table below) |
| Last Error Message | If an error occurs during operation, an English error message describing the error in more detail will be stored here. |
| User Input | Writing specially crafted strings to this property (described below) will cause the player to send remote control messages to the server when remote control is enabled. |
States
| Value | Symbol | Description |
|---|---|---|
| 0 | StateDisconnected | The player is disconnected and idle. |
| 1 | StateConnecting | The player is attempting to connect to the video server. |
| 2 | StateConnected | The player has established a connection. |
| 3 | StateError | The player encountered an error and the connection could not be established or was lost. More error details are in Last Error Message. |
User Input Property
The user input property allows scripts to invoke the player to send remote control data to the server. Changing the property value invokes the player – if the value does not change, in other words the property is set to the value it currently has, then the player will not be invoked, and no new input will be sent. To repeat the input, for example to send a duplicated keypress, the property should be cleared before rewriting the value.
The input string consists of one or more comma separated values. The first 3 values may consist of any or none of “shift”, “ctrl” and “alt”. The final value should be the keyboard character to send. Only one key sequence is supported at a time – to send whole words, write a single character to the input property, then replace it with the next and so forth. This may require a timestep script to allow the NetPlayerTexture actor to respond to the property change events.
The user input property currently supports sending complete keyboard sequences only – key press, then key release. There is no support to send individual key events or mouse events. Also note that the result at the server will depend on the server’s keyboard map, which may differ from that in use on the player machine.
Here’s some example user input strings:
| Input Value | Key Sequence | Result |
|---|---|---|
| R | Press R, Release R | Lower case r |
| shift,R | Press Shift, Press R, Release R, Release Shift | Upper case R |
| 4 | Press 4, Release 4 | Number 4 |
| shift,4 | Press Shift, Press 4, Release 4, Release Shift | Character $ |
| ctrl,c | Press Control, Press C, Release C, Release Control | Control-C |
| ctrl,alt,Delete | Press Control, Press Alt, Press Delete, Release Delete, Release Alt, Release Control. | Secure Attention sequence. |