Animation Sequencer
The Animation Sequencer is a keyframe-based animation editor that permits you to create and edit animations. It is a tabbed window that consists of media controls, a properties panel, track list, timeline, and track view.

To open the Sequencer, click on the Virtalis button at the top-left of the Toolbar and select Windows > Animation Sequencer. Alternatively, click and hold left mouse button over the Windows menu of the Toolbar and select Animation Sequencer. It can also be shown or hidden with Ctrl + Q.
User Interface
Media Controls
The Sequencer provides a standard set of controls for traversing your animations. Some of these controls are also available in the Properties window and Browser.
| Button | Description |
|---|---|
Seek to start of sequence (Home). | |
Seek to end of sequence (End). | |
Seek to previous frame (Up or Left Arrow). | |
Seek to next frame (Down or Right Arrow). | |
| Play sequence backwards from current time. | |
| Play sequence forwards from current time. | |
| Pause sequence at current time. This is shown over the play button whilst a sequence is playing. | |
| Enable or disable looped playback. | |
| In Manual capture mode, record the current state of the track targets. In Continuous or Motion capture mode, start or stop recording. The button is highlighted red whilst recording is in progress. |
Properties Panel
| Property | Description |
|---|---|
| Time | The current sequence position in seconds (or the current start position of selected frames, animations or tracks whilst performing a drag operation). This value is updated as the sequence is played. It is also an editable property, so you can type a value into it to jump to a time. [default: 0.00s] |
| Speed | The playback rate (0.5x = half speed, 2.0x = double speed, etc.). [default: 1.0x] |
| Capture | The type of recording to perform. There are 3 options:
|
| Step | The number of seconds to skip after a Manual capture. [default: 1.00s] |
| Rate | This replaces Step in Continuous or Motion capture mode. It is the number of keyframes to capture per second. [default: 10 Hz] |
| Auto Track | This checkbox is visible in Continuous or Motion capture mode. Enable it to automatically create an assembly track when an untargeted node in the scene is transformed. [default: false] |
Track List
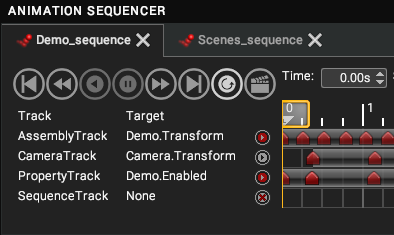
The Track List shows all the tracks in a sequence. It has 3 columns:
| Column | Description |
|---|---|
| Track | The name of a track node. A tooltip shows the location of the track node in the tree. |
| Target | The name of a node to animate with a track. A tooltip shows the location of the target node in the tree. |
| State | The current state of the track. There are 3 options:
|
The state of a parent track overwrites that of its children. For instance, if a Sequence Track is disabled, any tracks beneath it will also be disabled regardless of their individual states.
Resize
To make the track or target names wider, hover the mouse to the right of the column header then click and drag to resize.

Timeline
The timeline indicates the positions of Frames, Animations, and other Sequences within a sequence. Hold down the middle mouse button and drag to pan it left and right. Whilst hovering over the timeline, scroll the mouse wheel to increment or decrement the current time. Use Ctrl + Mouse wheel to zoom in and out. The timeline can display increments of 0.01 seconds to 1 minute.
| The Time Grip marks the current sequence position. Drag it along the timeline to animate the sequence. Double-click on it to return to time zero. |
|---|
Track View
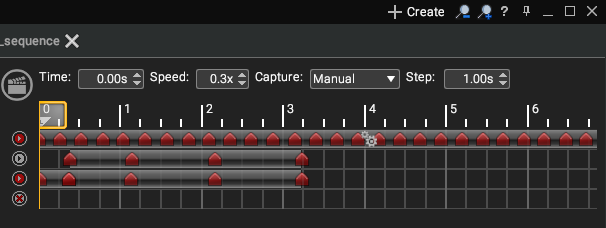
This is the main view in the sequencer. It permits Animations and Frames to be created and edited. Items can be selected and dragged with left-click. Hold Ctrl to select multiple Animations or Frames at once or Shift to perform box selection between a pair of Animations or Frames (i.e. to select them and anything in between). To scale an animation, hover the mouse at its start or end until the resize arrows appear and click to scale (the current scale will be shown as a percentage in the status bar).
Key
| Image | Description | Image | Description |
|---|---|---|---|
| Keyframe | Animation | ||
| Custom Action | Property Track | ||
| Audio | Sequence Track |
Create
Sequence
There are various ways to add a sequence to your scene:
- Press the
button in the Sequencer’s titlebar to add a sequence to a selected node. If no suitable nodes are selected, the sequence will be added to the Scenes node.
- Right-click in the empty Sequencer window and select Create Sequence from the context menu. A sequence will be added to a selected node or Scenes.
- Drag-and-drop a suitable node onto the empty Sequencer window. A sequence with an assembly or property track will be added to the node.
- Right-click on a node in the Data window or 3D scene and select Create > Sequence from the context menu.
Track
There are 5 types of animation track that can be added to a sequence:
| Track | Description |
|---|---|
| Assembly | Targets a node with a transform and records the changing position, rotation, and scale of that node over time. |
| Camera | A special type of Assembly Track that transforms a user’s camera. There can only be one Camera Track per sequence. |
| Property | Targets a node to record non-transform information such as material changes. Any type of node property can be recorded - Bool, Int, Float, Double, World Float, String, Link or Vector. |
| Component | Targets a component of a vector property track (x, y, z, or w). |
| Sequence | Targets a sequence. The targeted sequence may contain any number of tracks in it, including other sequence tracks (thus creating a hierarchy). |
To create a track, right-click over empty space in the Sequencer and select Create from the context menu.
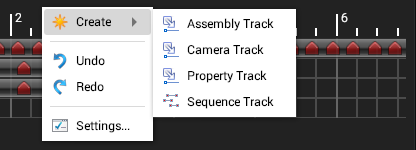
To create a component track, right-click on a property track in the track list and select Create > Component Track from the context menu.
Editing Animations
Interpolation
There are three options for interpolation with the default set to linear. They are accessed by right clicking on the assembly track to open the context menu.
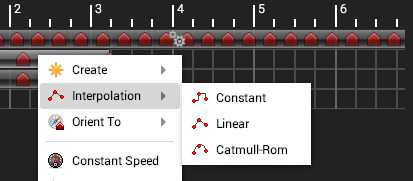
Each option describes how the path connects between keyframes.
| Interpolation | Description |
|---|---|
| Constant | A digital transition whereby the animation jumps from one keyframe to the next. |
| Linear | Moves in a direct line between keyframes. This is the default interpolation mode. |
| Catmull-Rom | Follows a smooth curve that passes through all the keyframes. |
In a sequence, each track or track section can use a different interpolation.
Orient To
There are five options for Orient to with the default set to keyframes. They are accessed by right clicking on the assembly track to open the context menu
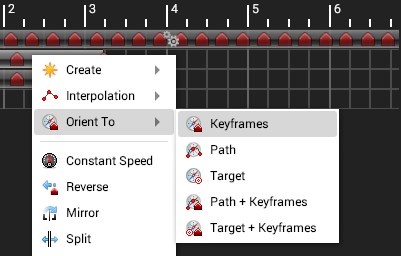
The five options determine how an object rotates along the path.
| Orient To | Description |
|---|---|
| Keyframes | Keyframe orientation uses rotational information applied to the keyframes. |
| Path | Path orientation will align the assembly to follow the path created by the keyframes. You need to specify the axis it will align to. This is dependent on the axis the model was constructed in. |
| Target | Target orientation allows you to add a target that the assembly will rotate towards. As with path, you need to specify the axis the model aligns itself to. |
| Path + Keyframes | This works the same as path orientation but allows you to add additional key frames. This would be used in situations such as a plane following a path but making a barrel roll. |
| Target + Keyframes | This works the same as target orientation but allows you to add additional key frames. This would be used in situations such as a camera operator following the lead car but panning slightly to the side to add the second-place car to the shot. |
Constant Speed
After editing the curve positions, you will find that the speed of movement along the path will change due to the increase or decrease in distance between points. In some situations, this may be what is required but if a constant velocity is needed you can correct this by applying a constant velocity from the context menu. This will not change the transform of the keyframes just their position on the timeline.
Reverse
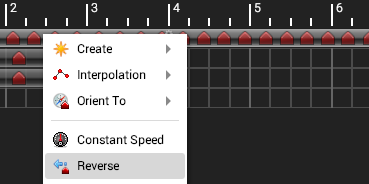
Whilst it is possible to play a sequence in reverse, when trying to link numerous sequences together to form a complex animation, it would be a better option to reverse the track so that all sequences are playing in the same direction. Reverse is available on the context menu.
Property Tracks
Property tracks are designed to allow you to animate non-transform values. These can be such things as changing a model, altering the colour or opacity of a material. Any node that can be dragged into the sequence editor that has a value associated with it can be animated.
The easiest way to add a property track is to drag and drop from the browser or developer tree. In this example, the ColourOverride material has been added to the sequencer.
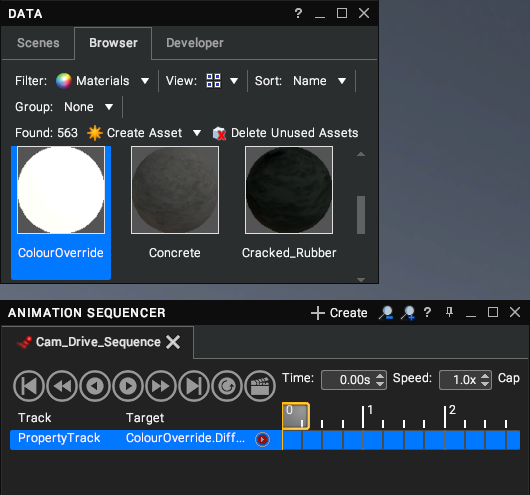
Select the Property Track in the sequencer and open the Properties window (Ctrl + P).
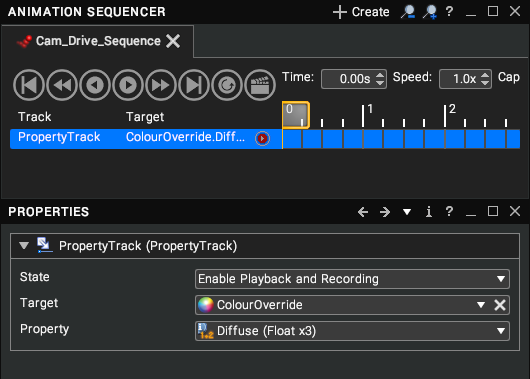
From the property drop-down, you can select which material property you wish to animate.
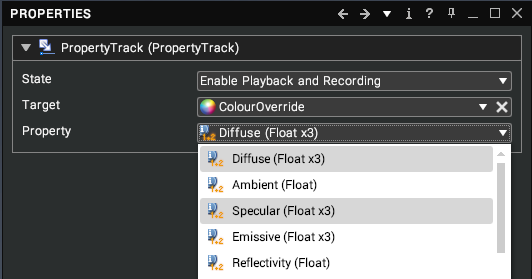
This applies to any node that you add a property track to. To record the changes, move the timeline to the required point and manually add a keyframe. Adjust the value, e.g. opacity from 1 to 0 and add another keyframe. When you play the sequence now, the opacity value will alter from 1 to 0 between the keyframes.
Scene Visuals
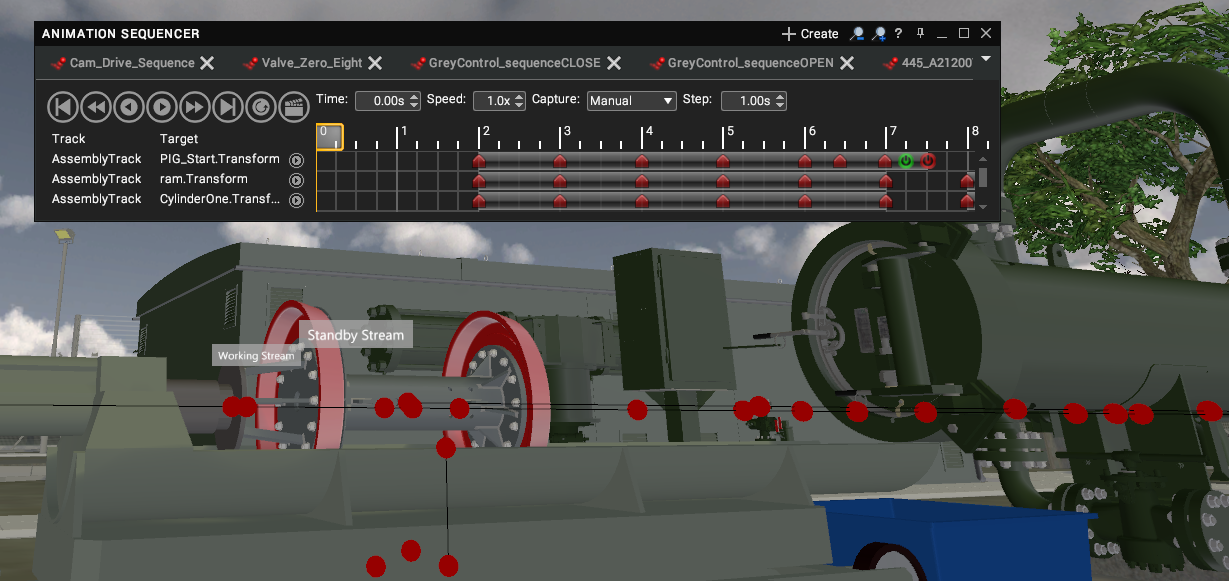
The sequencer generates visuals in the scene to show the animation paths of targets and to permit keyframe positions to be edited visually. The red circles represent keyframes and the lines between them represent the animation path of the target. Simply left-click on a keyframe marker to select it. It can then be moved with one of the manipulators (simply drag to move it with the mouse manipulator). Alternatively, hold Shift and click on a marker to bring up the PRS manipulator. The Properties window will show the current position of the keyframe.
Markers

Right-click on a keyframe marker to show the following context menu:
| Option | Description |
|---|---|
| Create | A submenu with 2 options:
|
| Fly to | Fly to the selected marker in the scene. |
| Delete | Remove this keyframe from the animation. |
Browser
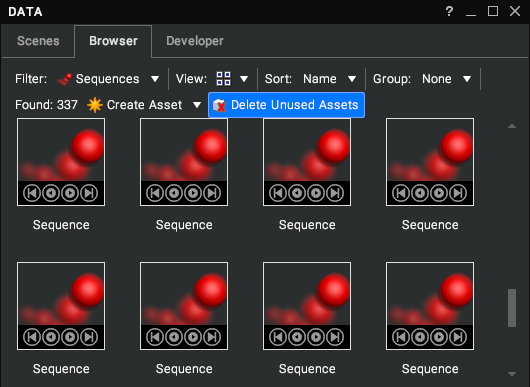
In large and small icon view, the Sequences browser depicts an illustrative bouncing ball icon. Double clicking on the icon opens the sequence in the Animation Sequence Editor.
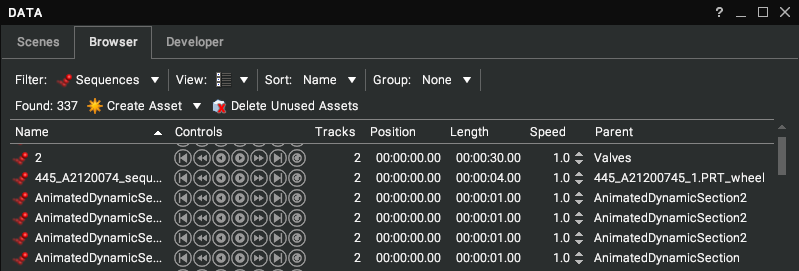
List view provides controls and information about number of animations, speed, etc.
Settings
The Sequencer can be configured via Settings > Animation Sequencer.
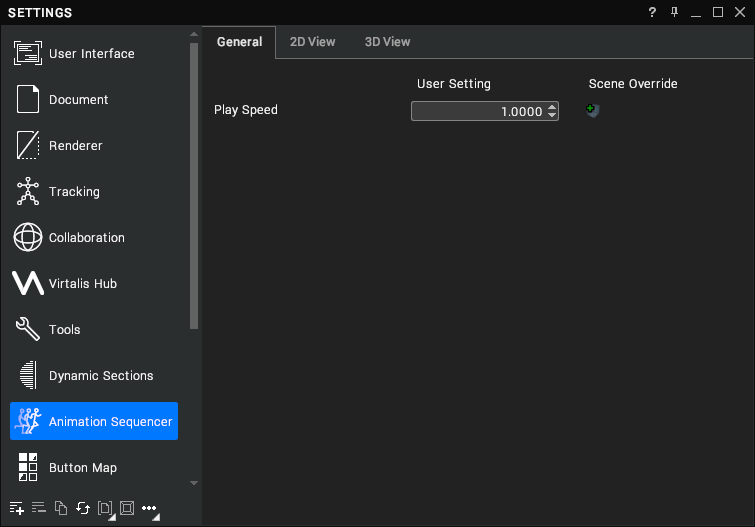
General
| Setting | Description |
|---|---|
| Play Speed | The global play speed for sequences, which multiplies the play speeds of individual sequences. A value of 0.5 is half speed and 2.0 is double speed, etc. This setting is useful when there are many sequences – possibly activated at different times by scripts – that need to be slowed down/sped up. [default: 1.0] |
2D View
| Setting | Description |
|---|---|
| Frames > Enabled | When enabled, keyframes are drawn in the sequencer track view. [default: true] |
| Frames > Snap To | When enabled, the time grip snaps to frames and frames snap to each other when dragged. [default: true] |
3D View
| Setting | Description |
|---|---|
| Show Visuals | How to present sequences in the 3D scene. There are 3 options:
|
| Markers > Enabled | When enabled, markers are drawn in the scene to represent the location of keyframes. [default: true] |
| Markers > Size | The size of the markers in pixels. [default: 20] |
| Markers > Colour | The colour of the markers. [default: dark red] |
| Markers > Highlight Colour | The colour of the markers that are selected. [default: red] |
| Lines > Enabled | When enabled, lines are drawn between keyframe markers to represent interpolation. [default: true] |
| Lines > Width | The width of the lines in pixels. [default: 1.0] |
| Lines > Colour | The colour of the lines between markers. [default: black] |