Gallery
The Gallery provides a categorised view of assets that can be added to your scene. It is divided into two panels. The left panel has two main functions. The first is to allow you to browse existing assets and add them to the Scenes tree. The second is to allow you to group a selection of assets together and save them into a collection. The right panel provides a preview of currently selected assets.
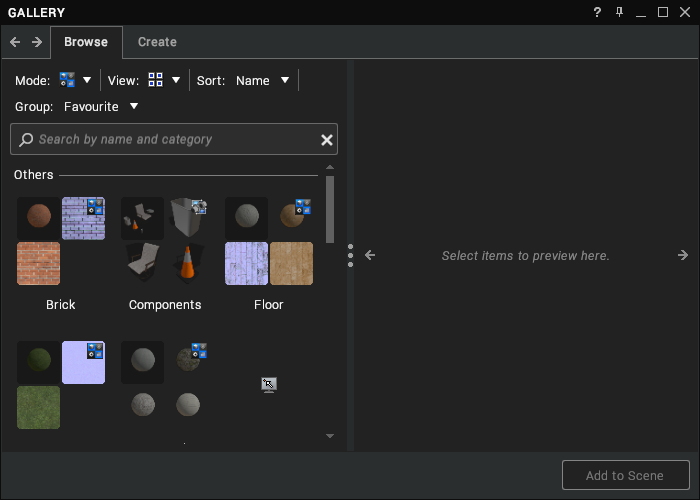
To open the Gallery, click on the Virtalis button at the top-left of the Toolbar and select Windows > Gallery. Alternatively, click and hold left mouse button over the Windows menu of the Toolbar and select Gallery. It can also be shown or hidden with Ctrl + G.
Navigation Buttons
The and
buttons at the top-left of the window navigate backwards and forwards through the selection history.
Browse Tab
The Gallery will display the Browse tab when it is first shown. Its primary purpose is to organise and display all the assets in the gallery folders. The Browse tab has two viewing modes: Category and Folder. These viewing modes can be chosen from the Mode drop-down menu located in the toolbar.
Category Mode
The category mode displays assets grouped by their type and category and serves as the primary interface for browsing and adding assets to the scene.
Types and Categories
When an asset is added to the gallery it is automatically assigned a category based on its content. For example, a sound file would be categorised under ‘Audio’, and a model would be categorised under ‘Component’. These initial categories are designed to help you organise and locate assets in the gallery more easily and are read-only.
To remove a category, right-click on its icon and select Remove Category from the context menu.
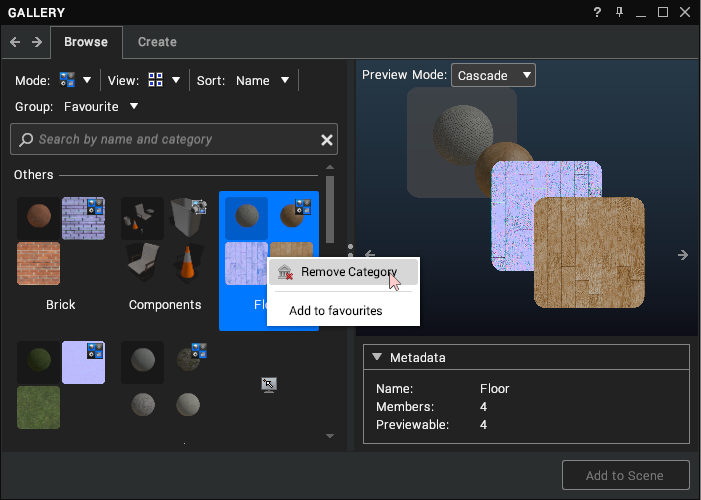
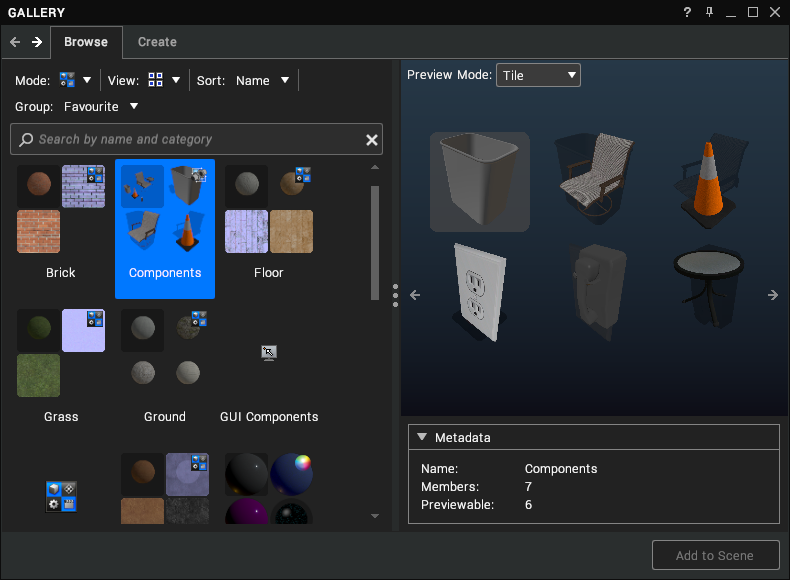
Select a category or type icon to preview its contents and show information about the number of assets it contains in the right-hand panel. The image below shows an example of the preview generated for the contents of the Components category.
Favourites
The Gallery permits you to bookmark your favourite categories so that you can access them more easily. There are 2 ways to do this:
- Right-click on a category and select Add to favourites from the context menu.
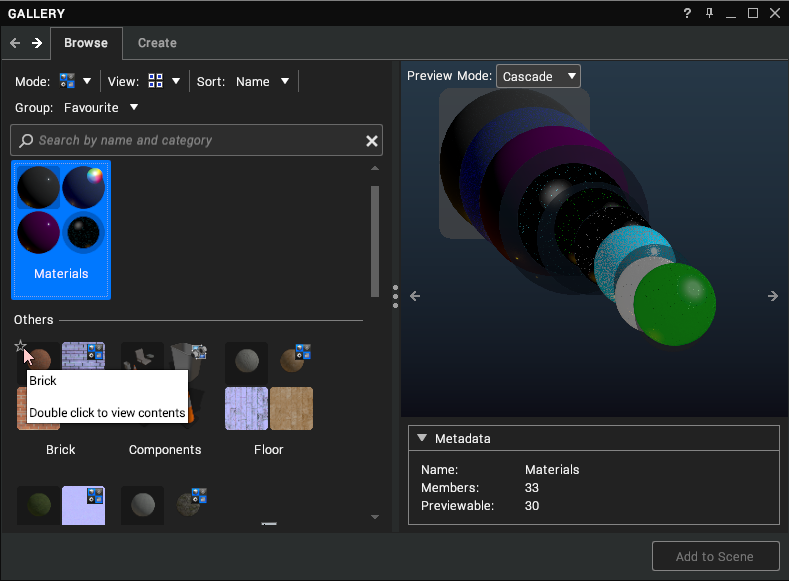
- Hover the cursor over a category until a star appears at the top-left of the icon. Click on the icon to add the category to your favourites. Note: In the list views, this icon will appear in a column of the list instead.
Searching
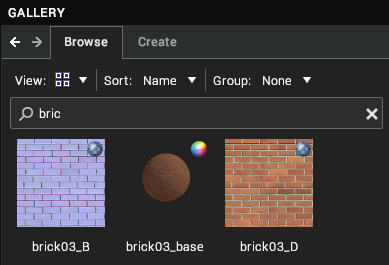
At the top of the Browse tab is the search bar. The search bar can be used to find assets by name and category. To search for an asset by name, simply type the search text into the search bar, using quotation marks to encapsulate spaces. Any assets in the gallery that match the name will be show in the asset view. An example of searching by name can be seen below.
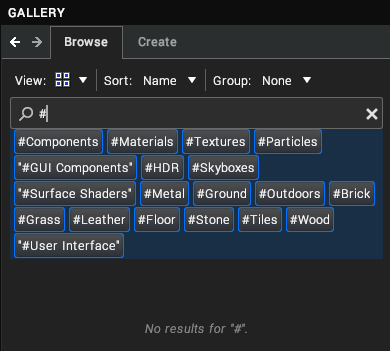
To search for assets by category you must prefix the name you’re searching for with the hash symbol. As with searching for assets by name, if the category name contains a space the entire search string must be encapsulated by quotation marks. As soon as you type a hash symbol into the text box the search bar will attempt to autocomplete your search for you by listing all matching types and categories underneath. An example of this can be seen below.
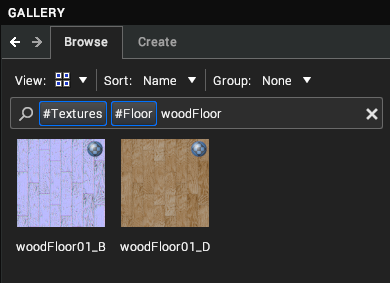
To search for an asset using multiple search terms, a space must separate each term. An example of an asset being searched for using a mixture of names and categories can be seen below.
Preview
If a category icon is double-clicked, all gallery assets that match the category will be shown in the left-hand panel. Selecting individual gallery assets will display a pre-rendered preview image of the asset alongside detailed metadata relating to the asset type and a list of the categories it belongs to. To enable a real-time and interactive preview of the asset, click on the Show Live Preview button.
The and
buttons at the sides of the preview navigate to the previous or next item in a directory.
Preview Modes
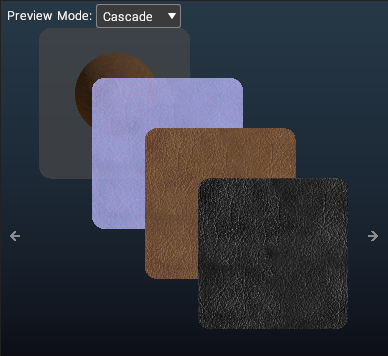
When there are multiple assets in a category, the preview mode drop-down menu will be shown at the top-left of the panel. It has 4 options:
| Image | Description |
|---|---|
 | Cascade Overlay all the assets in a category from the top-left to bottom-right of the preview panel. |
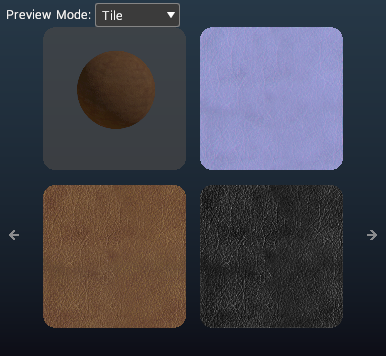 | Tile Organise the assets in a category as tiles. |
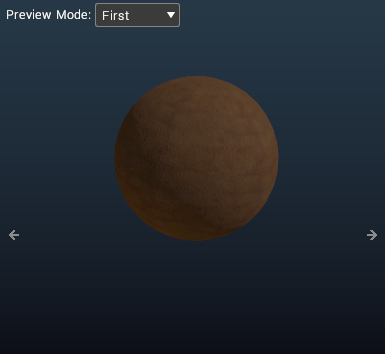 | First Only show the first asset in a category. |
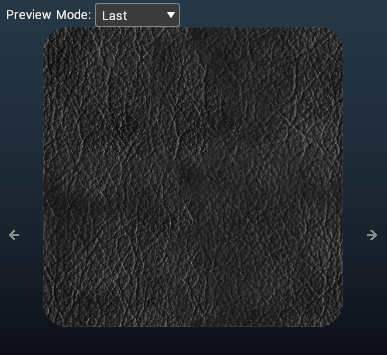 | Last Only show the last asset in a category. |
Editing Assets
To edit assets in the Browse view, right-click on them to bring up the context menu.
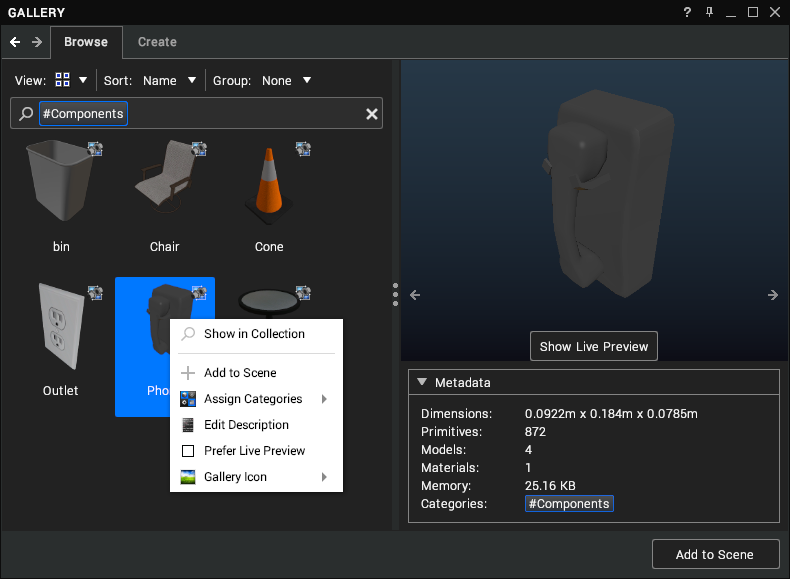
The context menu options permit the following actions to be performed on an asset:
| Option | Description |
|---|---|
| Show in Collection | Switch to the Folder view and show which VRCollection file the asset is stored in. |
| Add to Scene | Add the selected assets to the Scenes tree. |
| Assign Categories | Display a sub-menu which lists existing categories to assign to the assets and an input control which allows new categories to be named and created. To assign an asset to an existing category, enable the checkbox next to its name. Alternatively, to create and assign a new one, type in a name and select Create Category. |
| Edit Description | Add a multi-line text description to the metadata of an asset. |
| Prefer Live Preview | If the asset property is enabled, this asset will display a real-time interactive preview of its content by default. |
| Gallery Icon | This submenu can be used to set the icon of an asset (see Gallery Icon). |
Alternatively, a selected asset can be added to the scene by pressing the Add to Scene button at the bottom-right of the window.
Folder Mode
The folder mode displays assets as they are stored on the hard disk and allows for files to be viewed, copied, renamed, and deleted. By default, it will show the contents of your Personal assets folder, which can be found in Documents/VisionaryRender/Gallery.
Any compatible asset files in the directories listed under the Folders root directory will be indexed and added to the gallery. This can include your VRCollection files but also files in all the media file formats that the gallery supports.
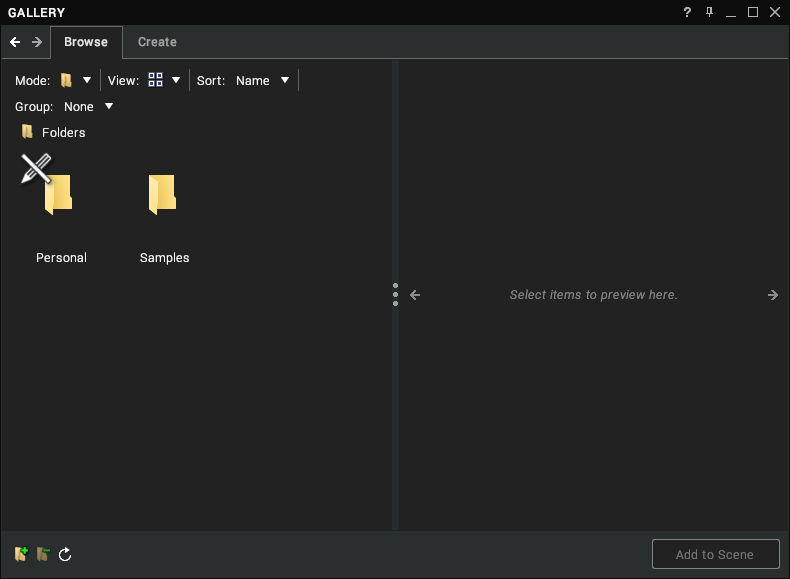
Adding/Removing Asset Folders
While in Folder Mode the gallery interface allows for additional directories to be added as asset source folders. Located at the bottom-left of the gallery frame are 4 buttons that are included for the management of asset folders.
| Button | Description |
|---|---|
| Add Folder | Adds a local directory to the list of gallery asset folders. A file dialog will be shown to permit you to browse to the desired folder. |
| Remove Folder | Removes the selected root asset folder from the asset folder list. Note: This will not delete the folder but simply remove it from the asset folder list. |
| Refresh | Forces the current page to refresh. |
Editing Files and Folders
To edit assets in the Folder view, right-click on them to bring up the context menu.
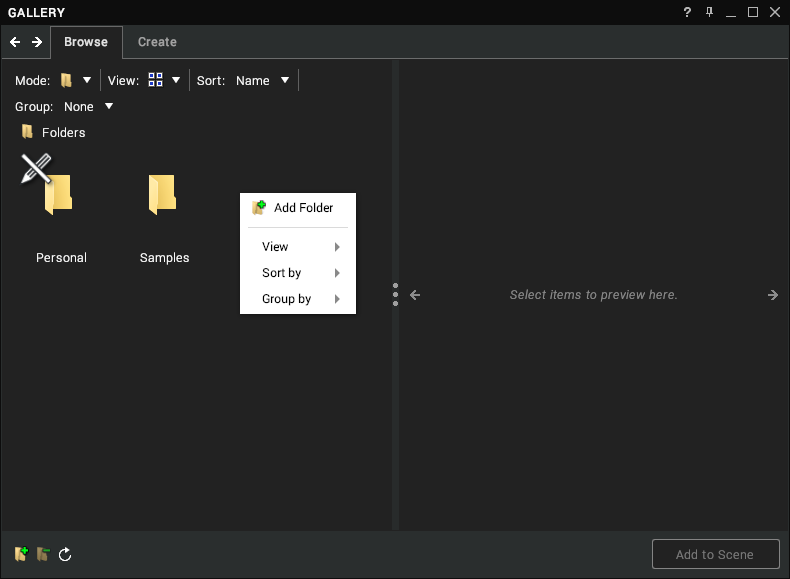
The context menu options permit the following actions to be performed on an asset:
| Option | Description |
|---|---|
| Add to Scene | Add the asset or collection of assets to the Scenes tree. |
| Open for Editing | Add the selection to a new scene so that it can be edited. The items will also be added to the Create tab so that any changes you make to then can be saved back to the Gallery. |
| Assign Categories | Display a sub-menu which lists existing categories to assign to the assets and an input control which allows new categories to be named and created. To assign an asset to an existing category, Enable the checkbox next to its name. Alternatively, to create and assign a new one, type in a name and select Create Category. |
| Cut | Remove the asset file from the folder and place it in the clipboard for pasting. |
| Copy | Copy the asset file from the folder and place it in the clipboard for pasting. |
| Delete | Delete the asset file from your hard drive. |
| Rename | Rename the asset file. |
| Refresh | Force a refresh of the asset previews and metadata. |
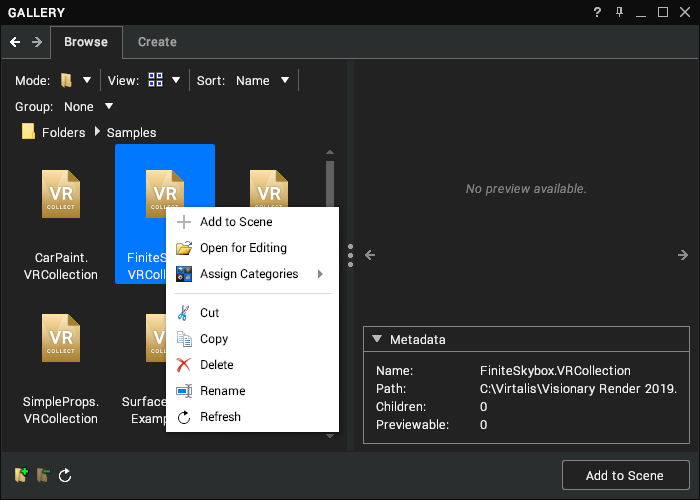
The context menu options available when right-clicking within the folder view without any items selected permit the following actions to be performed:
| Option | Description |
|---|---|
| Add Folder | Create a new folder in the current directory. |
| View | Allow the assets to be displayed in a variety of different layouts (see View). |
| Sort by | Sort the assets by a selection of their properties (see Sort). |
| Group by | Group the assets by a selection of their properties (see Group). |
Preview
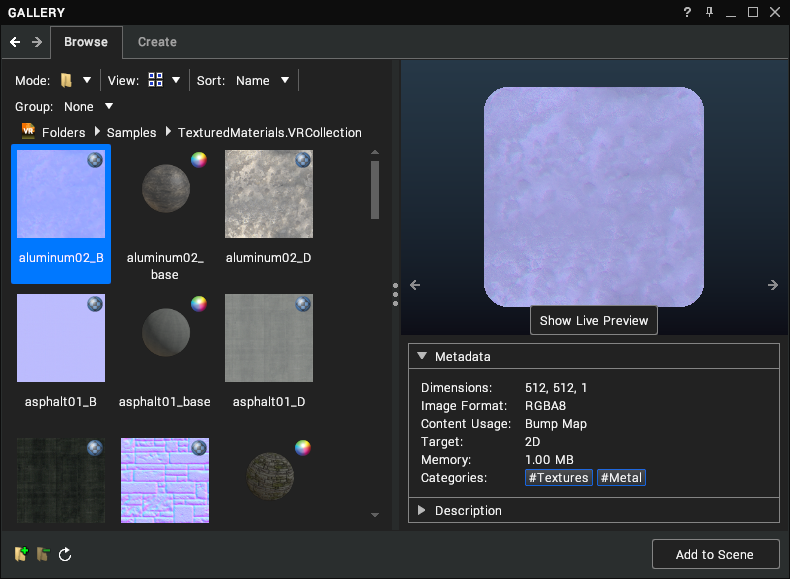
To preview the contents of a file, simply click on the icon. If the file is a VRCollection the preview panel will display pre-rendered images of the contents, relevant metadata, and the path to its location on disk. The image below shows an example of the type of metadata that is displayed when a VRCollection file is selected.
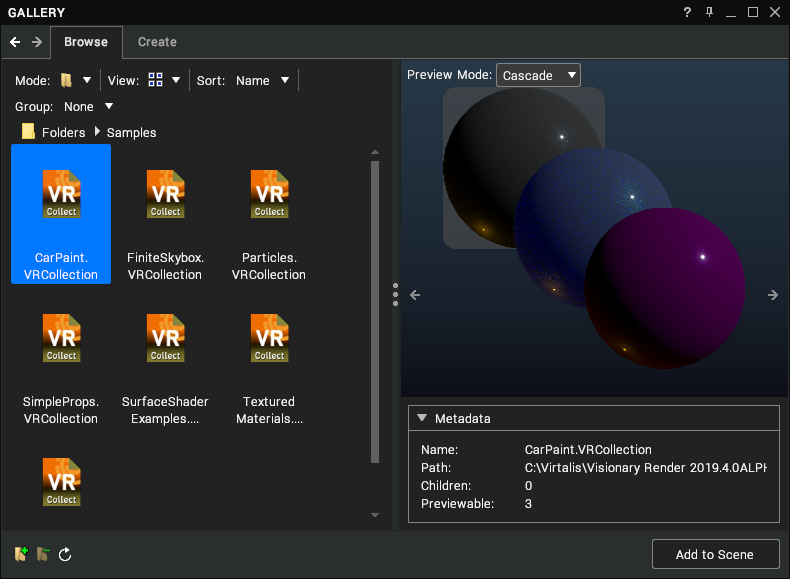
Double-click on a VRCollection file to display the individual assets that it contains and allow them to be interacted with and added to your scene. The image below shows an example of the contents of PrimitiveShapes.VRCollection.
Create Tab
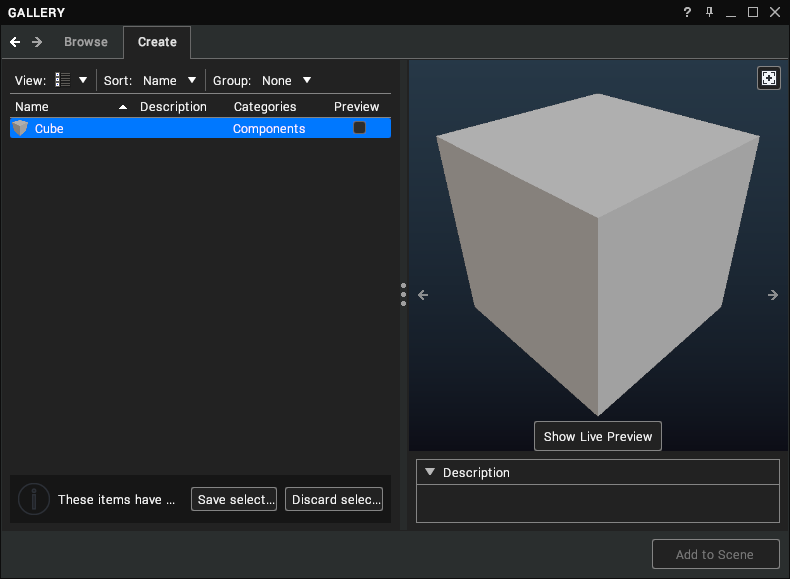
The create tab is used to create and save collections of scene assets into the gallery. An example of the create tab displaying a single asset item can be seen below.
Creating a Collection
There are 3 ways to add an asset to a collection:
- Select nodes in the Scenes tree, right-click on them and select Save to Gallery from the context menu.
- Select nodes in the Scenes tree and drag them into the empty area of the Create tab in the Gallery window.
- Select nodes in the 3D scene and drag them into the empty area of the Create tab in the Gallery window.
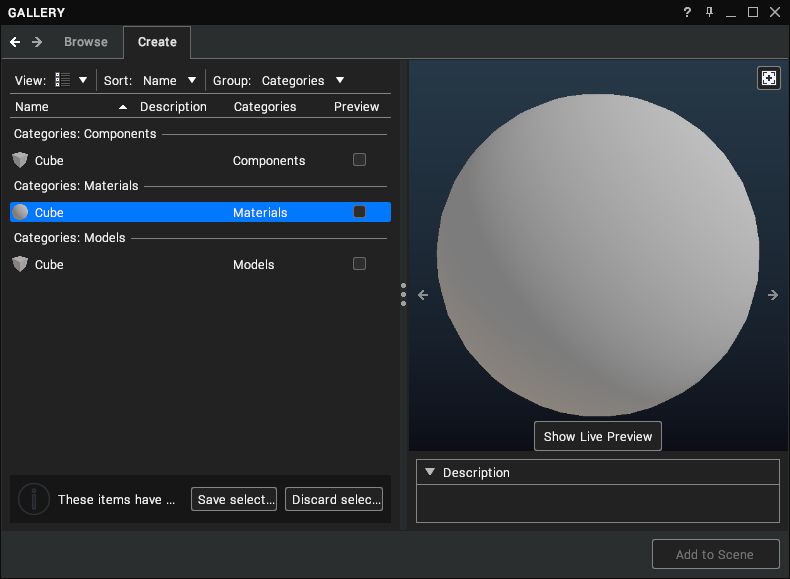
By default, when an asset node is dragged into the Create tab its dependencies will be saved within the collection but will not be visible as individual assets in the gallery. To ensure that the asset’s dependencies are visible in the gallery as individual components, the Shift key should be held whilst dragging the node into the create tab. The image below shows the result of dragging a cube primitive into the create tab with the Shift key held down.
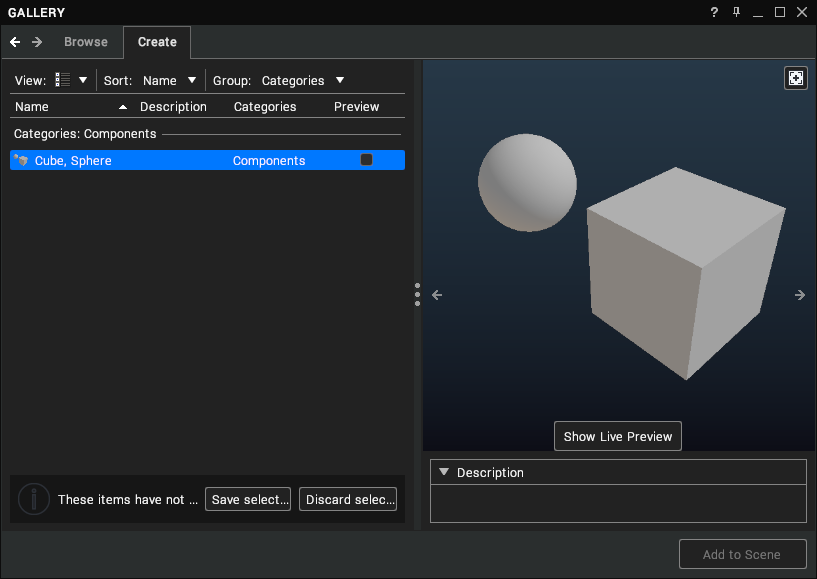
When multiple nodes are dragged into the create tab it is possible to combine all the assets into a single gallery item by holding the Ctrl key whilst dragging the assets into the create tab. An example of this can be seen below.
Once assets have been added to the create tab they can be saved into a collection using the Save All button located at the bottom of the left panel. Conversely, all the assets added to the create tab can be removed by pressing the Discard All button. Individual assets can be saved or discarded by selecting one or more items in the create tab and pressing the Save Selected or Discard Selected buttons that will appear at the bottom of the create tab.
Editing Properties and Metadata
Before saving assets into a collection, there are a variety of different types of metadata that you can add to the asset to help organise them once they’re added to the gallery. The ability to add and edit asset metadata is accessed via the context menu that appears after right-clicking on one or more assets in the Create tab.
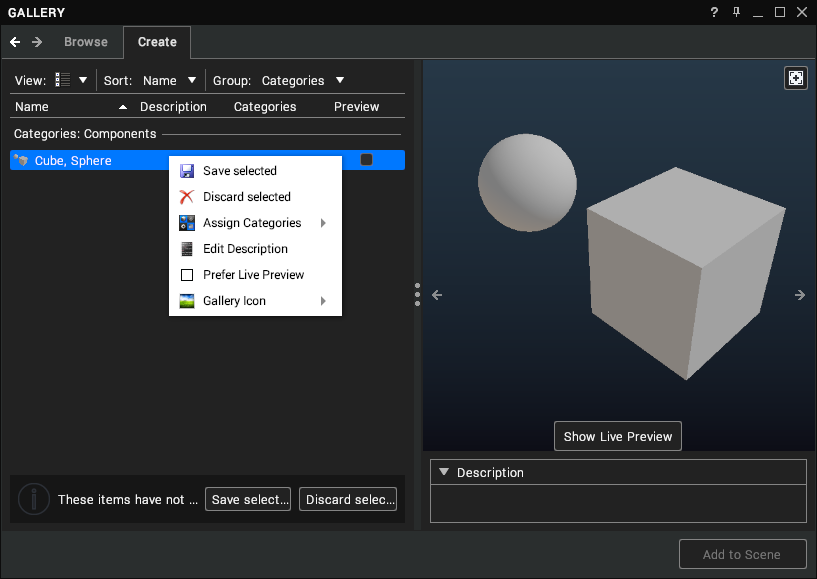
The context menu options permit the following actions to be performed on a gallery asset:
| Option | Description |
|---|---|
| Save selected | Save the selected item into a collection. |
| Discard selected | Remove the selected item from the Create tab. |
| Assign Categories | Display a sub-menu which lists existing categories to assign to the assets and an input control which allows new categories to be named and created. To assign an asset to an existing category, enable the checkbox next to its name. Alternatively, to create and assign a new one, type in a name and select Create Category. |
| Edit Description | Add a multi-line text description to the metadata of an asset. |
| Prefer Live Preview | If the asset property is enabled, this asset will display a real-time interactive preview of its content by default. |
| Gallery Icon | This submenu can be used to set the icon of an asset (see Gallery Icon). |
Toolbar
Both the Browse and Create tabs offer the ability to display the data in several ways. These options are listed under the View, Sort and Group buttons on the toolbar of the left-hand gallery panel and on the context menu when right-clicking in the left panel.
View
The View option permits the data to be shown in one of 5 ways:
| Image | Description |
|---|---|
| Large icons Show 96 x 96 px previews and icons of assets followed by their names. | |
| Small icons Show 48 x 48 px previews and icons of assets followed by their names. | |
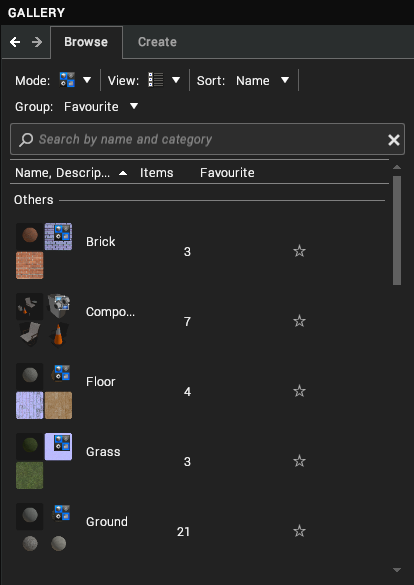 | Large list Show 48 x 48 px previews and icons of assets followed by their name and type. Additional columns show the location and description of an asset. |
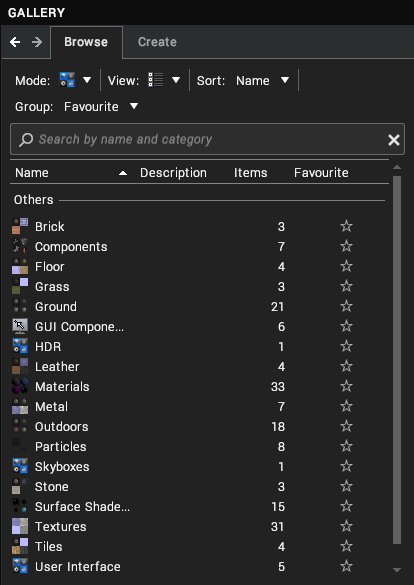 | List Show 16 x 16 px previews and icons of assets followed by their name. Additional columns show the type, location, and description of an asset. |
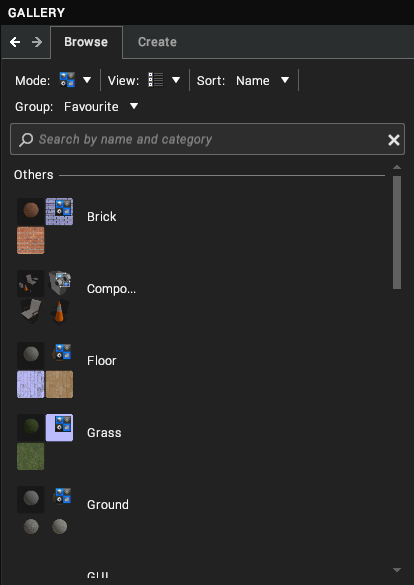 | Tiles Show 48 x 48 px previews and icons of assets followed by their name and type. |
Sort
The Sort option permits the data to be sorted in one of 7 ways:
| Sort By | Description |
|---|---|
| Name | Sort assets alphabetically by name. |
| Categories | Sort assets alphabetically by category. Create tab only. |
| Prefer live preview | Sort assets based on whether they have a live preview enabled and then alphabetically by name. Create tab only. |
| Description | Sort assets alphabetically by description. |
| Recently used | Sort assets on how recently they were used. |
| Number of items | Sort categories by the number of assets they contain. Browse tab only. |
| Favourite | Sort assets based on whether they are favourited. Browse tab only. |
Group
When the galleries icon view has a grouping mode enabled, the assets are divided into groups in the display. The sort mode will be applied to each group. An example of this functionality can be seen in the image below, where assets made up of a mixture of different types have been grouped by type and then sorted alphabetically by name.
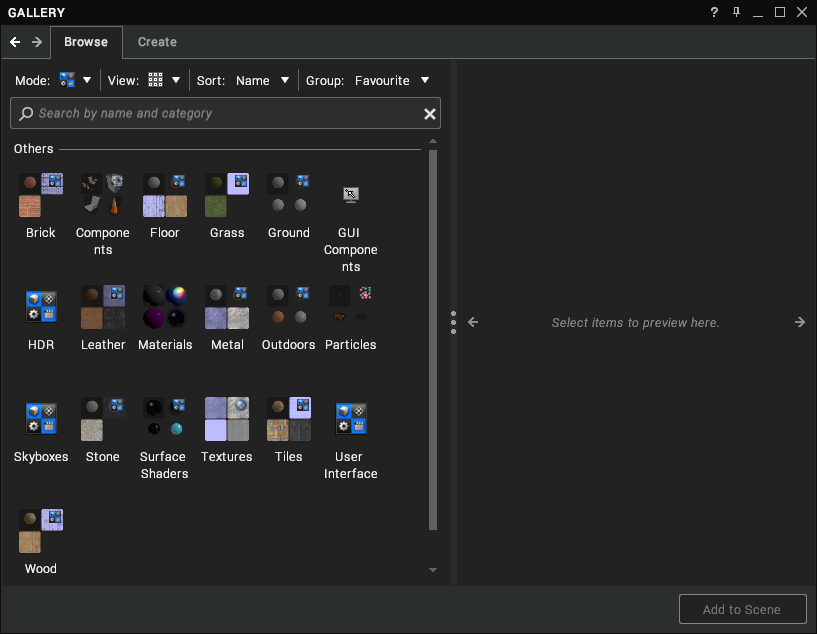
The Group option permits the data to be sorted in one of 8 ways:
| Group By | Description |
|---|---|
| None | Do not group assets. |
| Name | Group assets by the first letter of their name. |
| Categories | Group assets by the categories that they have been assigned to. Assets which have multiple categories applied to them will be grouped separately. Create tab only. |
| Prefer live preview | Group assets according to whether they have the live preview property enabled. Create tab only. |
| Description | Group assets by the text in their description metadata. |
| Recently used | Group assets into two groups, one which contains assets that have been recently added to the scene and another which contains assets which have not. |
| Number of items | Group categories by the number of assets they contain. Browse tab only. |
| Favourite | Group assets based on whether they are favourited. Browse tab only. |
Gallery Icon
This submenu can be used to set the icon of an asset. Right-click on an asset and expand the Gallery Icon menu.
![]()
There are 2 options:
| Option | Description |
|---|---|
| Set to current view | Capture the current view from the 3D scene and use that as the icon. |
| Load from image file | Open an image file from disk. Many image formats are supported but the aspect ratio will be adjusted to 1:1 to fit the icon. |