Settings
The Settings window permits you to configure the look and behaviour of Visionary Render to suit your preferences or requirements.
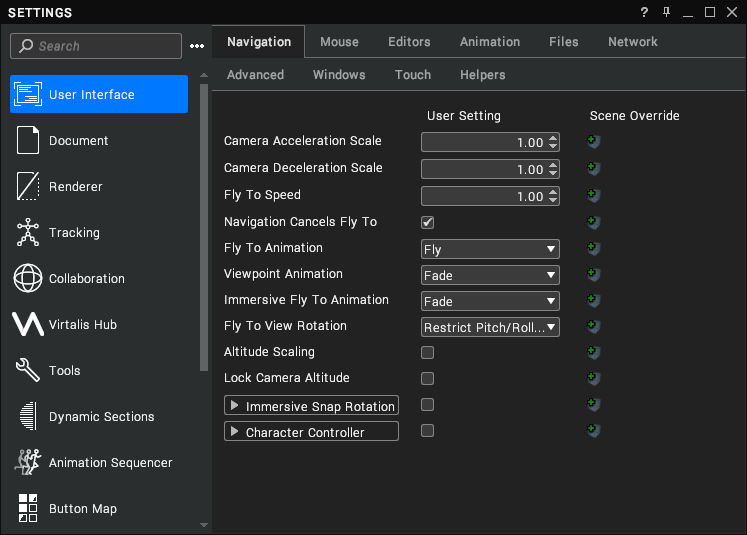
There are two types of settings:
- User Settings - These persist after exiting the software and are specific to each user.
- Scene Overrides - These are stored in scenes and can be used to override user settings when that scene is open. Most user settings can be added as scene overrides.
The Categories panel at the left contains the search bar, menu and settings categories; the Pages panel at the right contains the pages in each category and the contents of each page. To open the Settings window, click on the Virtalis button at the top-left of the Toolbar and select Settings. It can also be shown or hidden with F6.
Categories
The Categories panel at the left of the window lists the main types of setting within the application. Click on a category to display its settings pages in the Pages panel. You can also navigate the categories with the Up and Down arrow keys when the panel has keyboard focus.
Search Bar
Use the search bar at the top-left of the window to find a setting or page by name or path. Select the search bar (or press Ctrl + F if text focus is in the Settings window) and start typing to perform a query.
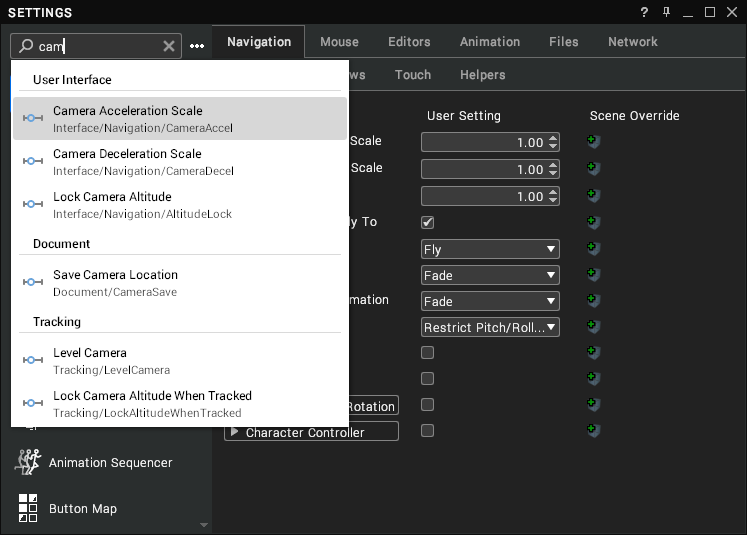
There are no wildcards and the search query text can appear anywhere within the results.
Select a result to open its page in the settings window. You can either use the mouse or Up and Down arrow keys + Enter to do this. The search results are organised by category and show the name/caption of the setting, its path, and an icon to show whether it's an individual setting or page. Hover over a result to show a tooltip with a description of the setting.
Search by Path
If your search query includes a / then the search will be by path instead of name. The root of the path is the category that the setting belongs to. For example, to see all the user interface settings you can type Interface/.
You can enter / as your search query to see a full list of settings and pages.
Menu
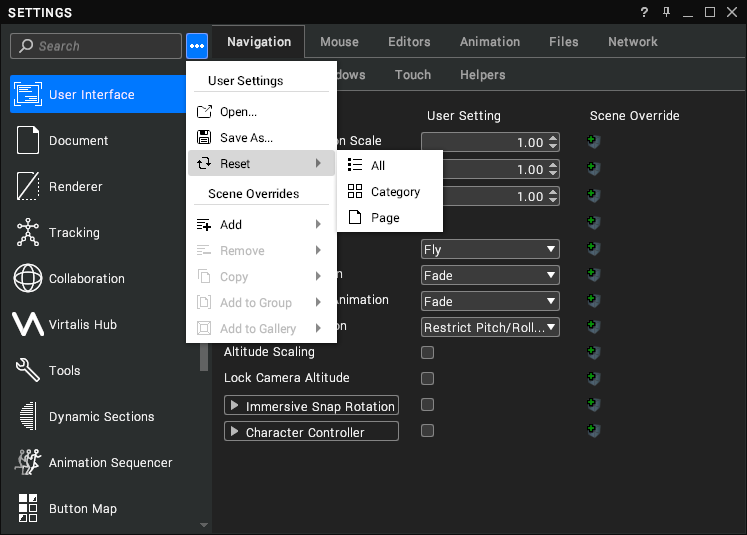
Select the ... button to open the menu as below, which permits you to perform various operation on user settings or scene overrides.
User Settings
| Option | Description |
|---|---|
| Open | Open user settings from a .VRSettings file. |
| Save As | Save user settings to a .VRSettings file. |
| Reset | Reset user settings to their default values. This can be all user settings or just those in the current category or page. |
Scene Overrides
| Option | Description |
|---|---|
| Add | Add scene overrides. This can be for all user settings or just those in the current category or page. |
| Remove | Remove scene overrides. This can be for all user settings or just those in the current category or page. |
| Copy | Copy scene overrides to replace the current user settings. This can be for all user settings or just those in the current category or page. |
| Add to Group | Add scene overrides to a new or existing group. This can be all scene overrides or just those in the current category or page. |
| Add to Gallery | Add all scene overrides to the gallery. |
Open and Save
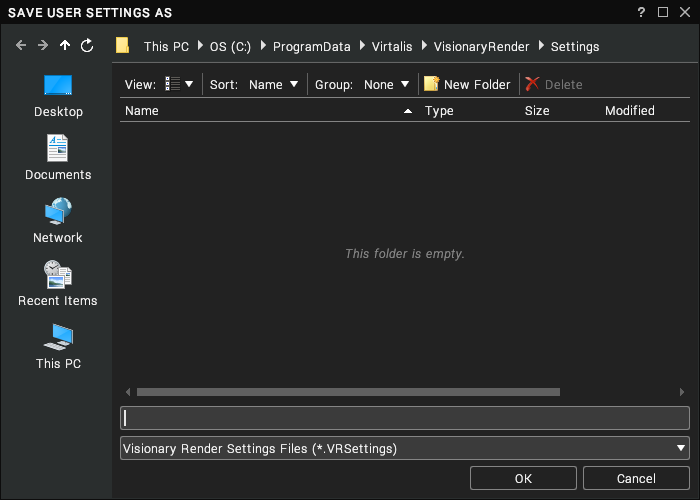
You can open and save user settings from files with the .VRSettings file extension. To save your settings for example, select the ... button and choose Save As... from the menu. A file browser will appear as below. Choose a name and location for the settings file then select OK.
A tree view will now appear as below. Choose the settings that you wish to save then select OK.
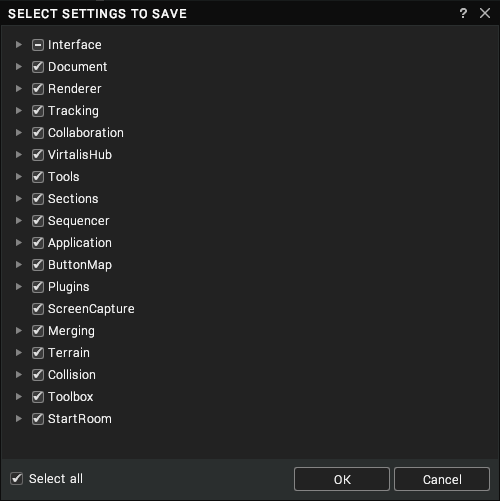
Your settings will now be saved to the specified file. You can open settings by following a similar process.
If you need to automatically load a settings file when Visionary Render is initialised, use the -restoresettings <file> command-line argument, where <file> is an absolute path to a .VRSetting file to load.
Pages
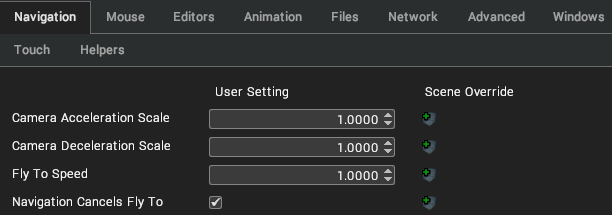
The settings area shows a tab for each page in a settings category and any settings within the current page.
There are 5 columns:
| Column | Description |
|---|---|
| Name | Shows the name of a setting. Hover over the text to see a description of the setting and its script accessor. Right-click on the text to open the context menu. |
| Lock | Shows a |
| User Setting | Shows the value of a User Setting. |
| Scene Override | Shows the value of a Scene Override if present, or a |
| Delete | Shows a |
Scene Overrides
Scene Overrides can be used to save settings - such as a skybox - with your scene. To add a Scene Override, click on the icon in the Scene Override column or right-click on the name of the setting and select Add Override from the context menu.
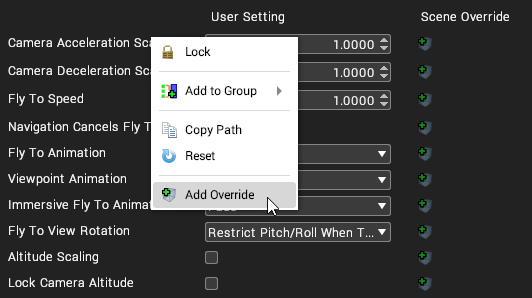
The Scene Override will take the value of the User Setting initially but can be changed independently to it. When a Scene Override is present, the active setting is highlighted with a Green border. This indicates that it is the current value being applied to the application. The inactive setting is highlighted with a Red border - its value can still be modified but won't be applied.
The values of User Settings are automatically saved when the application is exited. The values of Scene Overrides are saved when the scene is saved.
Locks
You can choose to ignore any Scene Overrides by locking specific User Settings. To lock a setting, right-click on its name and select Lock from the context menu. A icon will appear to the right of the setting name, and the User Setting will gain a Green border if there's a Scene Override to indicate that it is now the active setting.
To unlock a setting, right-click on its name and select Unlock from the context menu, or click on the icon. Locked settings persist between sessions, so you can permanently ignore Scene Overrides if you wish.
Groups
Settings can be added to Groups to permit their values to be captured by Snapshots and applied by Scripts. To add a setting to a Group, right-click on its name and select Add to Group from the context menu. Any existing Groups will be listed in the sub-menu alongside the option to create a new Group.
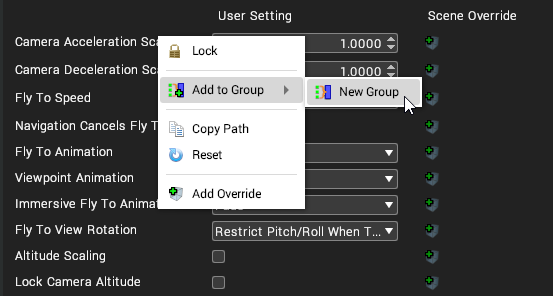
Because Groups are scene items, only Scene Overrides can be added to Groups. If a setting doesn't already have a Scene Override, one will be automatically created before it is added to the Group.