World
Visionary Render enables you to add terrain, an ocean, a sky, and weather effects like fog and rain to your scenes to create immersive 3D worlds.
Terrain
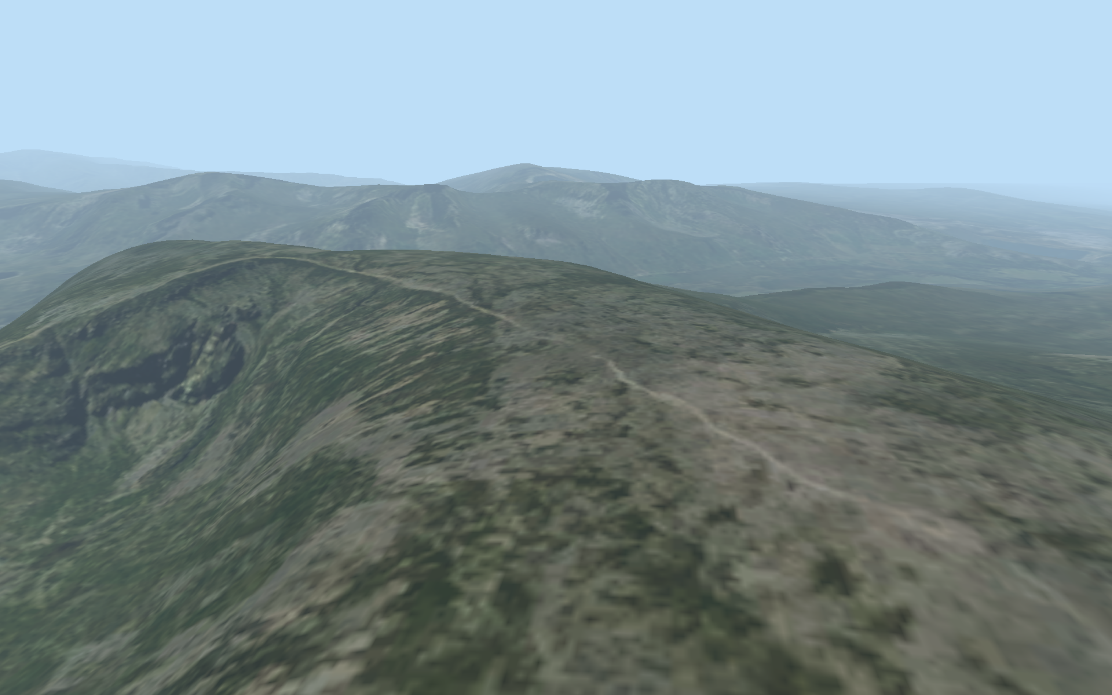
Visionary Render provides a simplified interface to the GeoVisionary 3 terrain system. Terrain is prepared by processing it with either the TileServer Converter or the VSI converter. GeoVisionary 3 files, if saved as VRNative, can also be loaded into Visionary Render, and used if the correct licenses are available.
Create
To add Terrain to your scene, open the Developer tree then right-click on the Scenes node and select Create > Terrain from the context menu.
Only one SimulationTerrain node may be active at a time. A SimulationTerrain is active when its immediate parent is the Scenes nodes. If the SimulationTerrain nodes parent is not the Scenes node then it will not render. Only one SimulationTerrain node may be parented to the Scenes nodes.
Properties
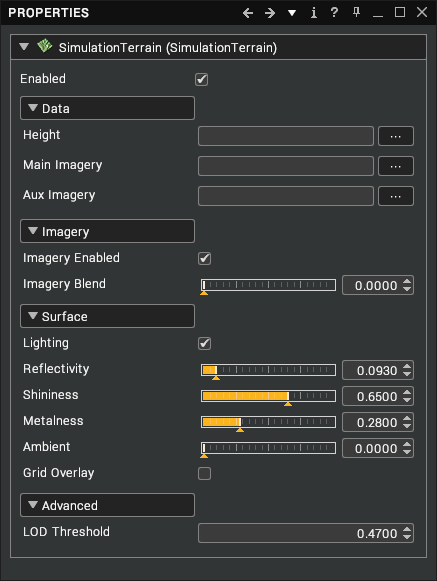
| Property | Description |
|---|---|
| Enabled | Controls whether terrain is visible. |
| Height | Path on disk to the prepared height data. |
| Main Imagery | Path on disk to the first layer of prepared imagery data. |
| Aux Imagery | Path on disk to the second layer of prepared imagery data. |
| Imagery Enabled | Controls whether the imagery layers are rendered. |
| Imagery Blend | Blends between the Main and Aux imagery layers. |
| Lighting | Controls whether lighting calculations modulate the terrain colour. |
| Reflectivity | Reflectivity of the terrain surface. |
| Shininess | Shininess of the terrain surface. |
| Metalness | Metalness of the terrain surface. |
| Ambient | Ambient term of the terrain surface. |
| Grid Overlay | Controls whether a dynamic grid is rendered over the terrain. |
| LOD Threshold | Controls the dynamic level of detail algorithm, lower values will cause the terrain to have greater detail farther from the camera at the cost of rendering performance. |
Ocean
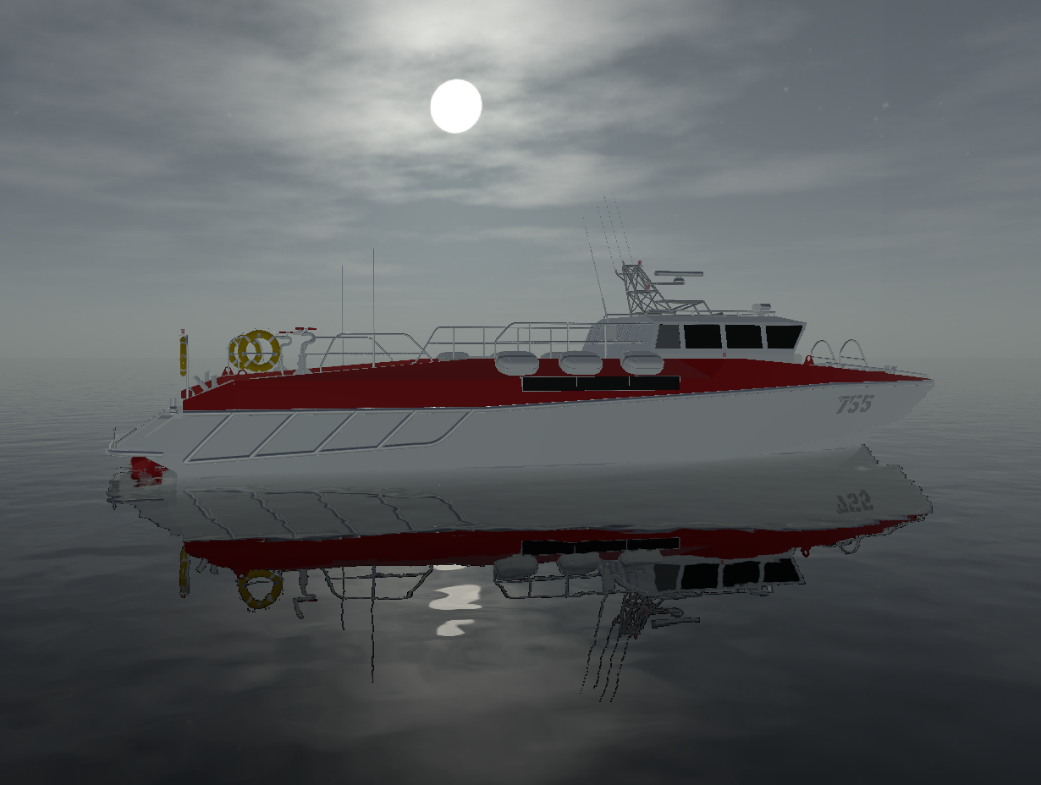
Visionary Render permits you to add an ocean to your scenes. It supports different sea states, reflections, underwater effects, caustics and more.
Create
To add an ocean to your scene, open the Developer tree then right-click on the Scenes node and select Create > Ocean from the context menu.
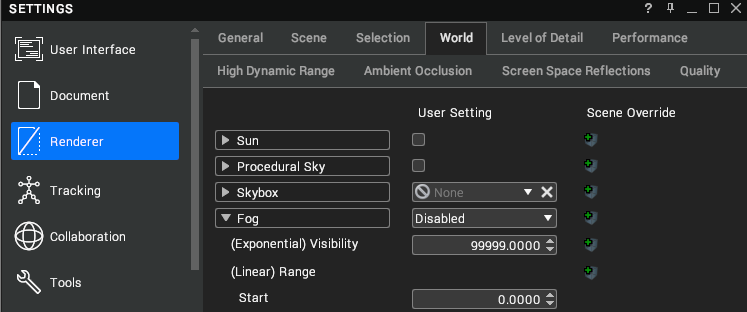
The ocean will appear black until lighting is added to your scene. For the ocean material to look correct, you need to add a skybox. To do this, press F6 to open the Settings window and select Renderer > World. Drag and drop a skybox from the Library tree, Browser, or Gallery onto the Skybox property.
Properties
By tweaking these properties, the appearance of the ocean can be configured from Caribbean to North Sea and anything in between.
| Property | Description |
|---|---|
| Enabled | Render the ocean. [default: true] |
| Animated | Animate the ocean. [default: true]
|
| Colour | The colour of the water. This colour is used in conjunction with the extinction distance and scattering amount to bias the final colour seen above and beneath the ocean. [default: blue] |
| Sea State | The general condition of the ocean with respect to how rough the wind waves are. This value corresponds to the WMO sea state codes – or Douglas sea scale (see table below) |
| Reflectivity | How much incoming light should be reflected in the water when looking straight down on the surface. Note that there will always be some reflection as the surface becomes more edge-on towards the horizon because of the fresnel effect. [range: 0.0 to 1.0; default: 0.02] |
| Local Reflections | Enable this to reflect the objects in the scene on the ocean surface, rather than just reflecting the skybox. Note that this involves drawing the scene a second time (flipped upside down), which will lower your overall framerate. [default: false]
|
| Sea Level | The base height of the ocean in metres from the world origin. [default: 0.0] |
| Spray | Add a particle spray effect to cresting waves at high sea states. [default: false] |
| Wind Direction | Direction of the wind. Used to control the general direction of the waves. [range: -180 to 180 degrees; default: 0] |
| Wind Bias | How much the waves will appear to travel in the direction of the wind. 0 means they will move chaotically back and forth into and out of the wind. 1 means they will move very noticeably along the wind direction. [range: 0.0 to 1.0; default: 0.4] |
| Displacement Scale | Scales the geometric displacement of waves. This can be used to make the ocean surface completely flat but still retain the lighting of a 3D surface. [range: 0.0 to 1.0; default: 1.0] |
| Underwater Effects | Enable underwater caustics, scattering and extinction effects. [default: false] |
| Extinction Distance | The distance in metres a ray of light must travel through the water before it's almost entirely extinguished. For the clearest ocean waters on earth this value would be 150 metres. [range: 0.0 to 200.0; default: 50.0] |
| Scattering Amount | Scales the amount of light scattered towards the viewer due to particulate matter such as algae in the water. [range: 0.0 to 1.0; default: 0.11] |
| Depth Scale | Scales the calculated submerged depth of objects used by the underwater lighting model to attenuate light from above the ocean. This allows you to tweak the final effect if your scene isn't visible enough under realistic conditions. A value of 1.0 means no scale, therefore realistic depths are used. [default: 1.0] |
| Distance Scale | Scales the distances the underwater lighting model uses to calculate realistic fog effects. This allows you to tweak the final effect if your scene isn't visible enough under realistic conditions. A value of 1.0 means no scale, therefore realistic distances are used. [default: 1.0] |
| Surface Lighting Depth | Controls how much scattered light is affected by local lights and shadows when rendering the water surface. [default: 0.5] |
| Size | The size of the caustic cells in the scene. [default: 3.8] |
| Strength | The intensity of the caustics. [default: 0.6] |
| Extinction | Permit caustics to be affected by depth. [default: true] |
Douglas sea scale:
| Code | Wave Height (m) | Description |
|---|---|---|
| 1 | 0 to 0.1 | Calm (rippled) |
| 2 | 0.1 to 0.5 | Smooth (wavelets) |
| 3 | 0.5 to 1.25 | Slight |
| 4 | 1.25 to 2.5 | Moderate |
| 5 | 2.5 to 4 | Rough |
| 6 | 4 to 6 | Very rough |
Examples
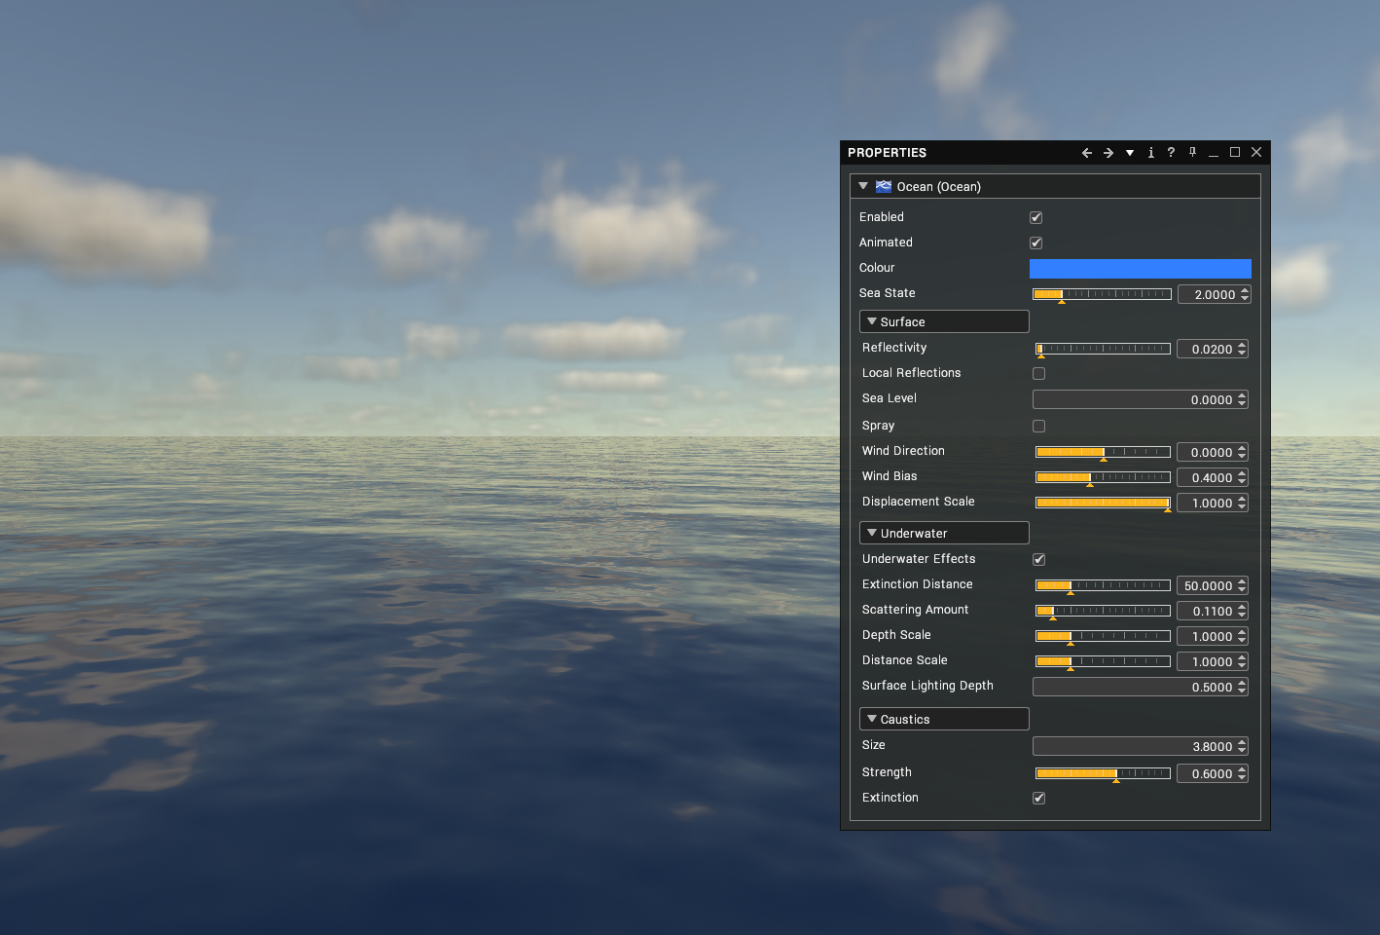
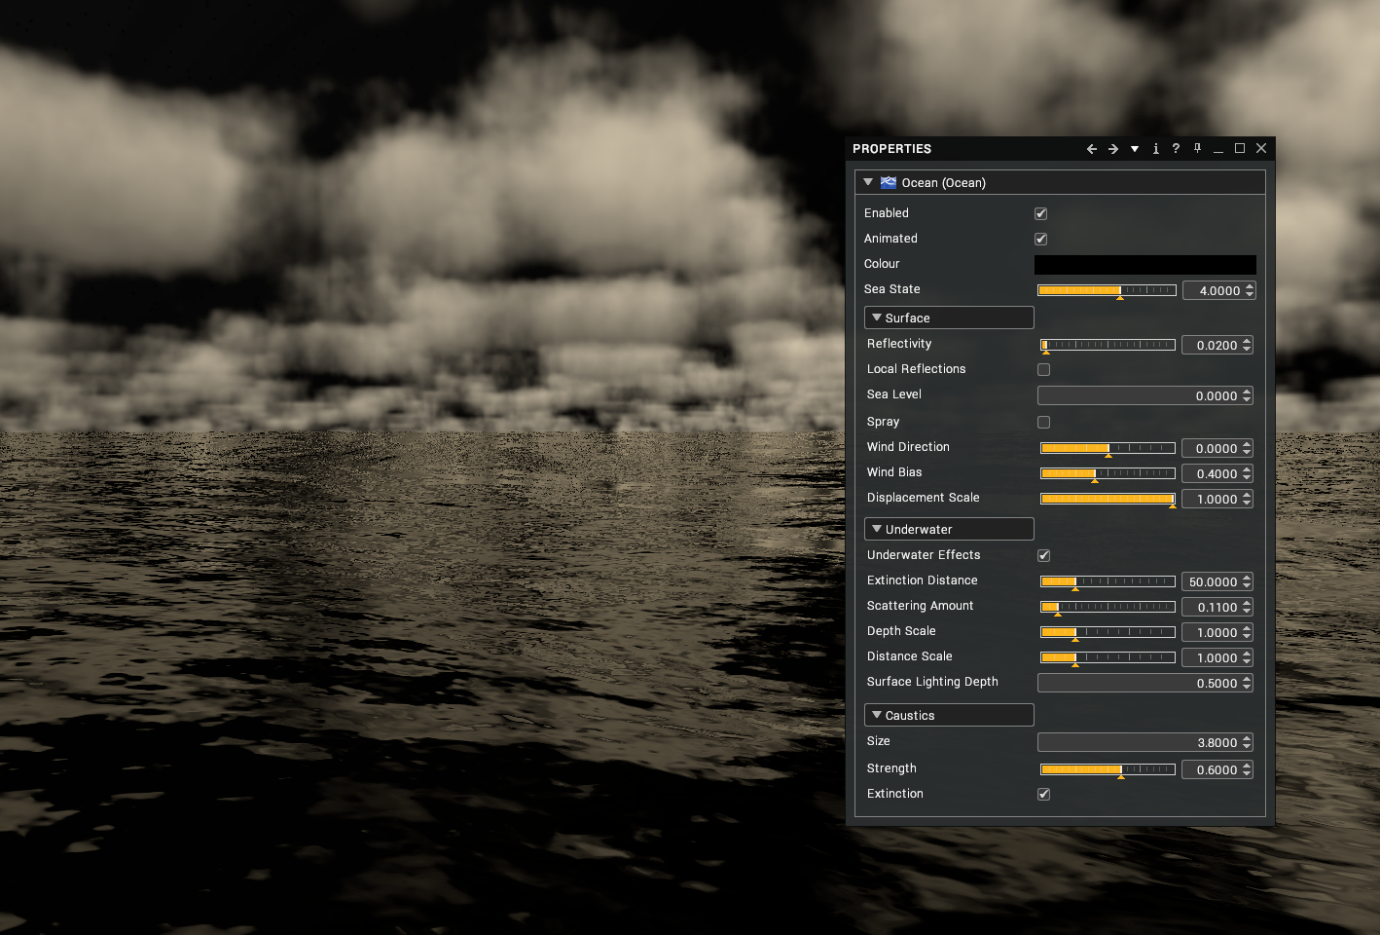
Sky
Visionary Render supports two types of sky: procedural sky and skyboxes.
Procedural Sky
The procedural sky permits you to generate sky boxes dynamically rather than using a pre-generated image or photo. If enabled, it will override the skybox if one is present. The procedural sky can be enabled in Settings > Renderer > World.
| Setting | Description |
|---|---|
| Render From Probe | When this is enabled, the procedural sky is rendered as a skybox. It means that you can’t fly into the clouds as they are no longer a 3D element. This will improve performance over a fully procedural sky. [default: true]
|
| Ground Colour | Colour of the lower hemisphere of the skybox. This is affected by the sun but not by other lights in your scene. [default: black] |
| Moon Azimuth / Elevation | Adjusting these values will move the position of the moon in the sky. [default: 90.0, 45.0] |
| Moon Phase | The dropdown provides options to adjust the phase of the moon. [default: Full Moon] |
| Brightness | Adjust the brightness of the sky relative to the sun. [default: 1.0] |
| Adjust Scatter | When enabled, it provides options to adjust the particle density and size that alters the sky colour based on scattering of light. [default: false] |
| Rayleigh Density | Adjust the amount micro particles scatter sun's light in the atmosphere. Responsible for the blue colour in the sky. [default: 1.0] |
| Mie Density | Adjust the amount of large particulate affecting scattering. Responsible for the white glare seen around the sun. [default: 1.0] |
| Light Pollution Colour | Adjusts the colour of light pollution. Most notable when the sun is down. [default: white] |
| Light Pollution EV | Adjusts the exposure value of light pollution. [default: -14.5] |
| Coverage | Adjusts the density of cloud cover. [default: 0.25] |
| Quality | The higher the quality the better the clouds will look but this will impact on performance. [default: Standard] |
| Height | Adjusts the altitude of the clouds. If Render From Probe is not enabled, you can fly into a through the clouds. [default: 4000.0] |
| Thickness | Adjusts the thickness of the cloud layer. [default: 2000.0] |
| Density | Adjust the density of the cloud layer (i.e. how dark the clouds appear). [default: 0.16] |
| Starmap Rotation | This controls the star map rotation. Stars are visible when sun position is at twilight and night. HDR may need to be set for best view. [default: 0.0, 0.0, 0.0] |
| Altitude | Adjust the height of the scene relative to the ground (in metres). Increasing this will make the horizon appear lower. [default: 1000.0] |
Sun
When procedural sky is enabled, it automatically enables the sun.
| Setting | Description |
|---|---|
| Position | Sets the suns position for set times of the day. |
| Azimuth / Elevation | If custom is set, this allows you to adjust the suns position. |
| North Difference | Sets the difference between true north and grid north. |
| Exposure Value | Adjust the exposure value of the sunlight. |
| Render Disk | This will position a disk to represent the sun in the scene. |
| Shadows | When enabled, the sun will cast shadows in the scene. Shadow settings are the same as directional light settings. |
Skybox
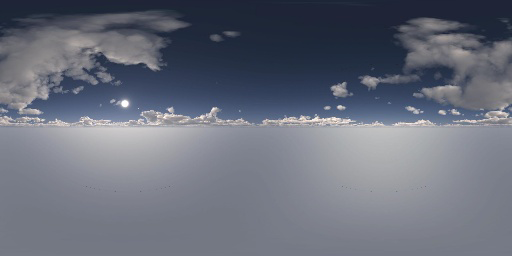
Skyboxes use one of two formats of texture that are required to provide the correct environment for reflections in a scene. Without either a skybox or environment map, the materials created will be flat looking as they will only reflect the scene background colour.
Skyboxes are available as part of the resources available via the ftp link. These are pre-generated cubemap.dds files that can be added to any scene.

The jpg file is a low-resolution preview to show what the skybox appears like whilst the useable DDS files are available as normal and HDR (High Dynamic Range) versions. Skyboxes are added the same as normal textures and can be dragged and dropped into the Visionary Render window.
Once the file is added to your texture library, it can be added to the scene or user settings. Open Renderer > World in the Settings window then drag and drop the texture into the Skybox slot.
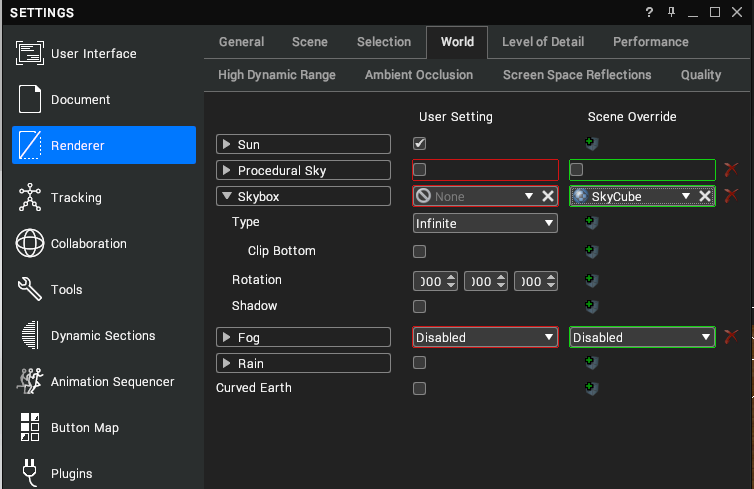
Latitude longitude skybox files can also be used and there are many available online – search images for: lat long sky. There are three types of Skybox to select from:
Infinite
These are the skybox DDS textures that extend to the horizon in all directions. The skybox uses a specific DDS format that can be created using AMD CubeMapGen.
In Visionary Render, they will appear as below.
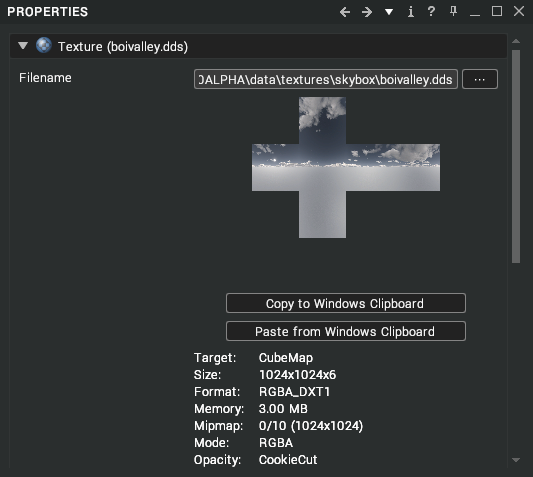
Use the Clip Bottom property to clip the bottom face of Infinite skyboxes.
Box
A box skybox is created in the same manner as infinite but has a finite size. With an infinite skybox, you can continue to fly and will never get closer to the horizon. Box skyboxes can be enclosed rooms, courtyards etc. These have a fixed size.
Examples can be found at:
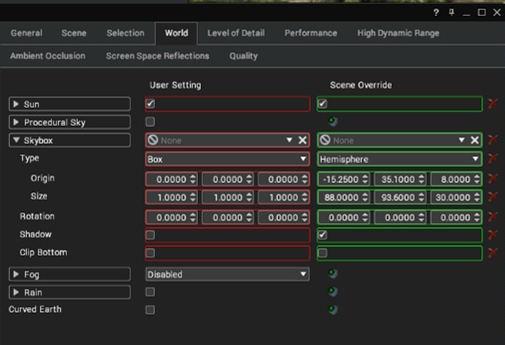
With box, you need to set the boundary size and position of the box and adjust to suit.
Hemisphere
The hemisphere skybox uses a hemisphere geometry rather than a cube. DDS cubemaps work perfectly well when mapped to a hemisphere - the only real difference is the geometric shape.
Fog
Fog has three settings. By default, fog is turned off with two other options of exponential or linear fog.
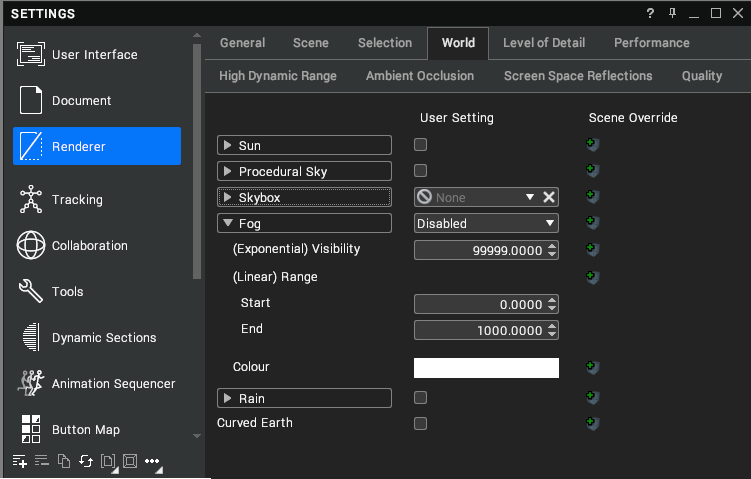
Linear uses a start and end distance. The end distance is the distance at which the fog is 100% density. Exponential is the distance at which 5% Luminant intensity is perceived due to fog. The colour specifies the fog colour.
Rain
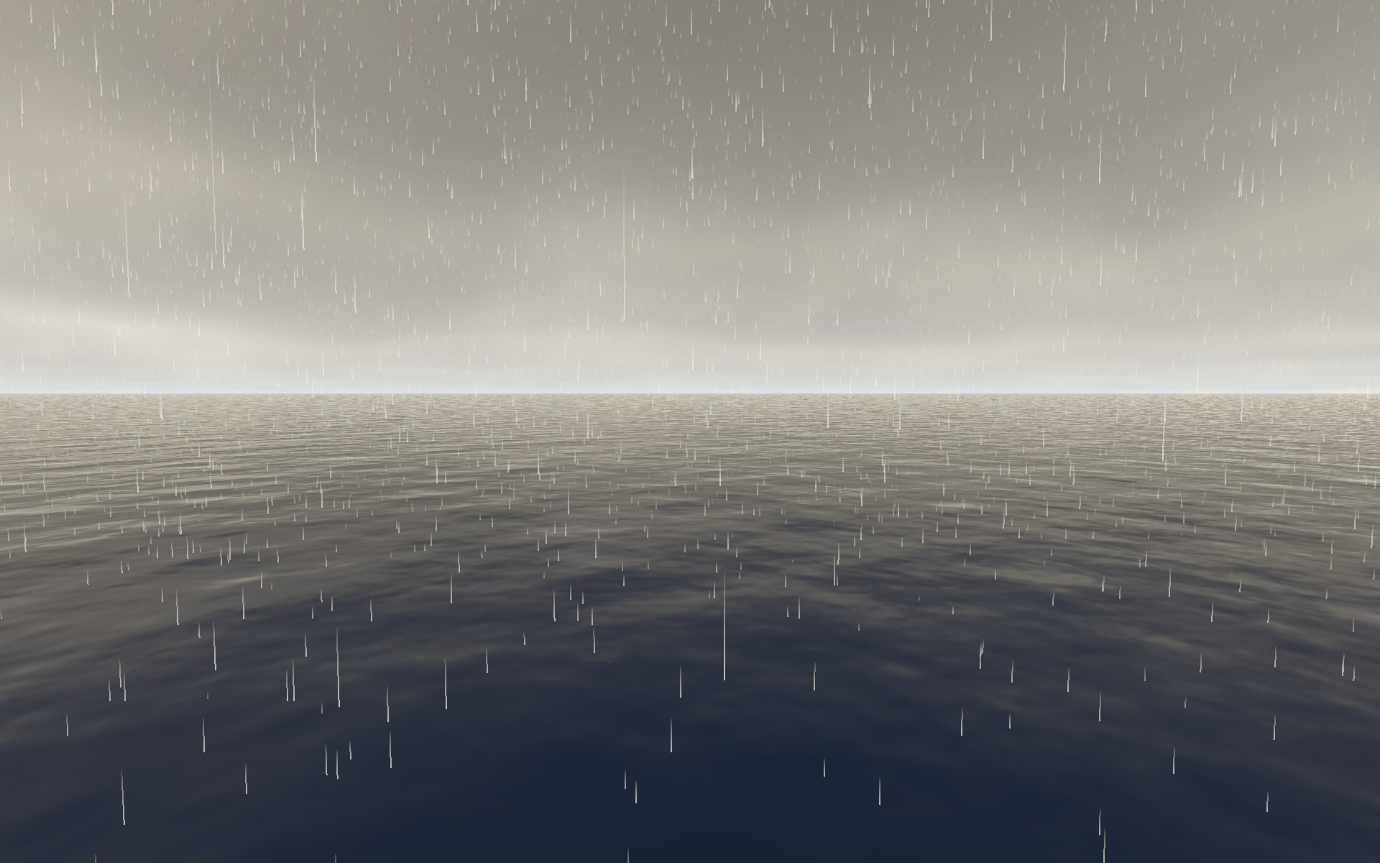
When enabled a particle system is created that provides a rain effect.
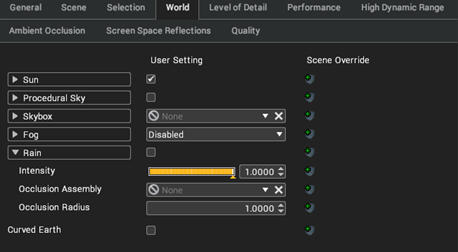
Intensity controls how heavy the rainfall is. The occlusion assembly is a link to a scene assembly that uses the occlusion radius to stop the rain effect visibility. This is used when you wish to have a rain effect in the scene but don’t want the rain entering an area such as a building.
Scale
The world scale feature allows the 3D scene to be viewed at a scale that is different from its true size. Normally, Visionary Render renders the scene at 1:1 scale. For a very large or very small scene it can be useful to view the scene as a scale model, to make viewing more comfortable on a stereo monitor and to allow easier interaction in a tracked environment.
The scale of the world can be changed in the Settings window under Renderer > Scene > Scene Scale.
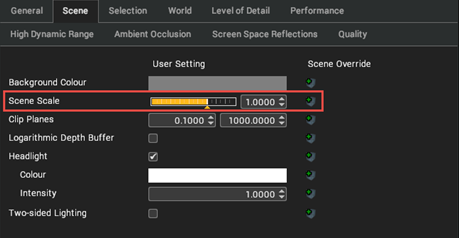
Adjusting the world scale affects only the view and leaves the true size of the data unchanged. Any measurements in the scene will continue to display their unscaled values. A value of 1 means the scene it rendered at its true size. A value of 0.1 means the scene is scaled to 10% of its true size. A value of 2 means the scene is scaled to twice its true size.
The slider has a logarithmic scale to allow for a wide range of possible values. The minimum value is 0.000001 (a scale of 1:1000000, or one millionth of true size) and the maximum is 1000 (1000:1, or one thousand times true size).
The effect of scaling the scene will only be apparent with a tracked view and/or stereoscopic 3D. Adjusting the scale of a scene viewed in mono an untracked desktop monitor will have no visible effect.