Pivots
When importing models, it is often the case that the local origin is at the wrong location. This can become a problem when you wish to orient the model in your scene. For instance, you may have imported a door model that you need to rotate about its hinges, but the local origin may be at the centre of the door. The local origin could be moved in the software that was used to author the model, but this is not always convenient or possible. Pivots offer an alternative by defining a new point at which to rotate a model about.
Create
Pivots are attached to Assemblies and can be created from the context menu. To add a pivot to an assembly, right-click on that assembly in the tree view or scene (if it has a visual) and select Create > Pivot from the context menu.
There are two options in the submenu:
| Option | Description |
|---|---|
| At Visual Origin | Create a pivot at the local origin of the model. This can be used when the local origin is at the correct location, but the model has an incorrect rotation. |
| At Visual Centre | Create a pivot at the centre of the model (determined by its bounding box). |
You can only have one pivot per assembly.
Edit
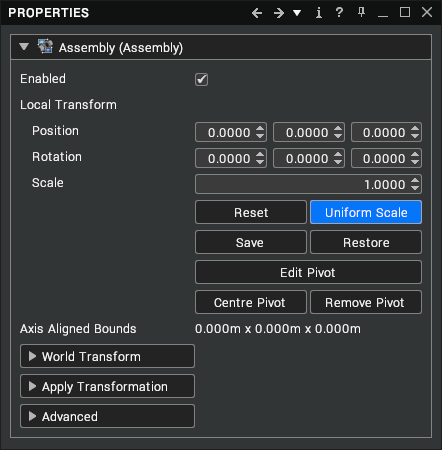
The position and orientation of a pivot can be configured from the Properties window. Select the Assembly with the pivot in the tree view or scene (if it has a visual) to bring up its properties. You should see some additional buttons for the pivot in the Properties window as below.

| Button | Description |
|---|---|
| Edit Pivot | Enable or disable pivot editing. When enabled, the button will be highlighted. The pivot can be edited in the Properties window via the local transform, world transform or apply transformation number edit boxes. It can also be moved and rotated in the scene with the standard manipulation tools (e.g. Mouse, SpaceMouse and PRS). |
| Centre Pivot | Reset the position of the pivot to be at the centre of the model. Also resets the rotation of the pivot to match the model. |
| Remove Pivot | Remove the pivot from this assembly. |
Pivots can also be moved in the scene with the PRS manipulator enabled (F9). Select the Assembly with the pivot, then hold down Ctrl + Alt and click somewhere in the scene to move the pivot to that location.
Snapping
You can snap pivots to a surface or a vertex for precise placement.
Select an assembly and use these shortcut keys to enable snapping:
Ctrl+Alt- Enable surface snapping on the selected objectShift+Ctrl+Alt- Enable vertex snapping on the selected object
Click on a new location while snapping is active to either move the existing pivot or create a new one at the specified point.
Settings
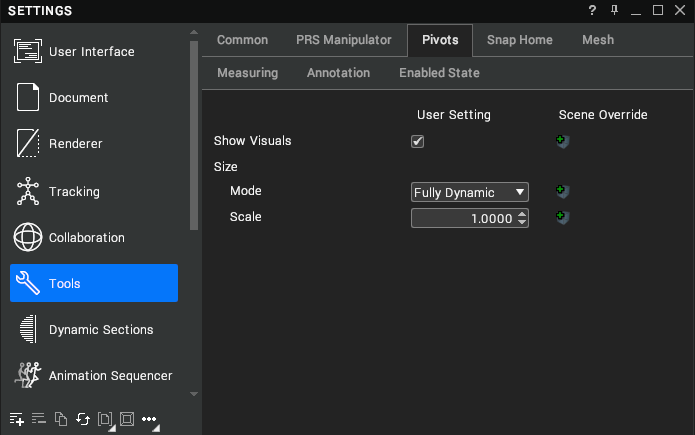
You can configure pivots by opening the Settings window (F6) and navigating to Tools > Pivots.

| Setting | Description |
|---|---|
| Show Visuals | Show pivot visuals on selected assemblies. [default: true] |
| Mode | The method used to size the pivot visuals. [default: Fully Dynamic] |
| Mode > Scale Step | The distance the camera needs to move from a pivot visual before it is scaled in partially dynamic mode. [default: 0.5] |
| Scale | The scale of the pivot visuals. [default: 1.0] |